
If you’ve ever wanted to control a single light from two different locations, you need to understand 3 way switch wiring. It’s one of the most common electrical tasks in homes — found in hallways, staircases, and large rooms. Yet many people find it confusing at first glance.
Don’t worry. This guide breaks down 3 way switch wiring into simple, easy-to-follow steps. Whether you’re a first-time DIYer or just need a refresher, you’ll walk away feeling confident and ready to tackle this project safely.
What Is 3 Way Switch Wiring and Why Does It Matter?
3 way switch wiring lets you control one light fixture from two separate switch locations. Think about a long hallway — you want to flip the light on when you enter from one end and turn it off when you exit from the other. That’s exactly what a three-way switch setup does.
Unlike a standard single-pole switch, a three-way switch has three terminals instead of two. These terminals connect to the common wire, the traveler wires, and the power source. Understanding each terminal is the first key to mastering this wiring method.
This type of wiring is also important for electrical code compliance. The National Electrical Code (NEC) often requires three-way switches in stairways and long corridors to ensure safety and convenience. Getting it right the first time saves you from costly mistakes and rewiring later.
Finally, knowing 3 way switch wiring opens the door to smart switch upgrades. Many modern smart home switches use the same wiring concept, so this foundational skill keeps paying off.
Tools and Materials You’ll Need Before You Start
Before diving into 3 way switch wiring, gather everything you need. Having the right tools on hand makes the job smoother, safer, and faster.
Essential Tools
- Voltage tester — always test wires before touching them
- Wire stripper — for clean, accurate wire stripping
- Flathead and Phillips screwdrivers
- Needle-nose pliers
- Electrical tape
Materials Required
- Two three-way switches (not single-pole)
- 14/3 or 12/3 electrical cable (with traveler wires)
- Wire connectors (wire nuts)
- Switch boxes (if installing new)
- Grounding wire
Quick Comparison: 3 Way Switch vs Single-Pole Switch
| Feature | Single-Pole Switch | 3 Way Switch |
|---|---|---|
| Number of terminals | 2 | 3 |
| Controls light from | 1 location | 2 locations |
| Has traveler wires | No | Yes |
| Common terminal | No | Yes (black screw) |
| Best use | Single room | Stairs, hallways |
| NEC requirement | Basic areas | Stairways, corridors |
Always turn off the circuit breaker before starting. Use your voltage tester to confirm power is off. Safety is non-negotiable in any electrical wiring project.
Understanding the Key Components of 3 Way Switch Wiring

Let’s break down the parts you’ll work with. Understanding these makes 3 way switch wiring much less intimidating.
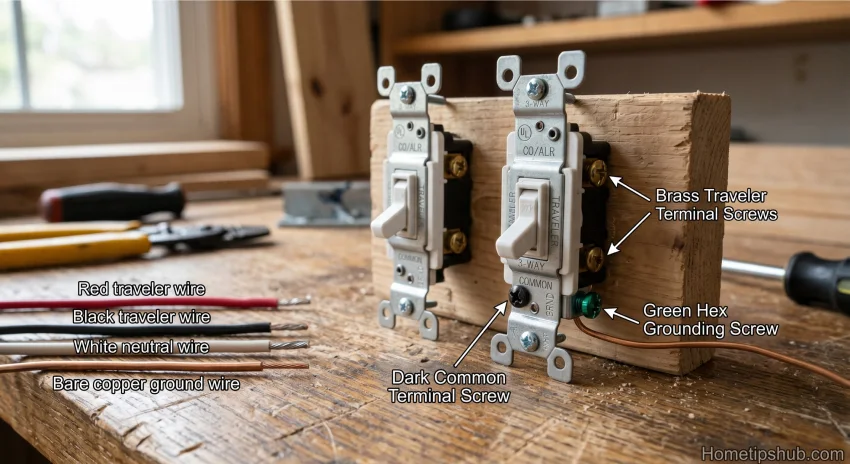
The Common Terminal
The common terminal is the dark-colored (usually black) screw on each three-way switch. This is the most important terminal. At the first switch, it connects to the hot wire from the power source. At the second switch, it connects to the wire going to the light fixture. Never mix this up with the traveler terminals.
The Traveler Wires
Traveler wires run between the two switches. They carry current back and forth, depending on the switch position. In 14/3 cable, the red and black wires typically serve as travelers. They connect to the traveler terminals (brass or silver screws) on both switches.
The Ground Wire
The ground wire (usually bare copper or green) connects to the grounding screw on each switch and to the metal switch box. This is a critical safety component in any residential wiring project.
The Neutral Wire
The neutral wire (white) runs from the power source to the light fixture but typically bypasses the switches entirely. In some modern switch wiring configurations — especially for smart switches — the neutral is needed at the switch box.
How to Wire a 3 Way Switch: Step-by-Step Instructions
Now let’s get into the actual 3 way switch wiring process. Follow these steps carefully, and you’ll have it done right the first time.
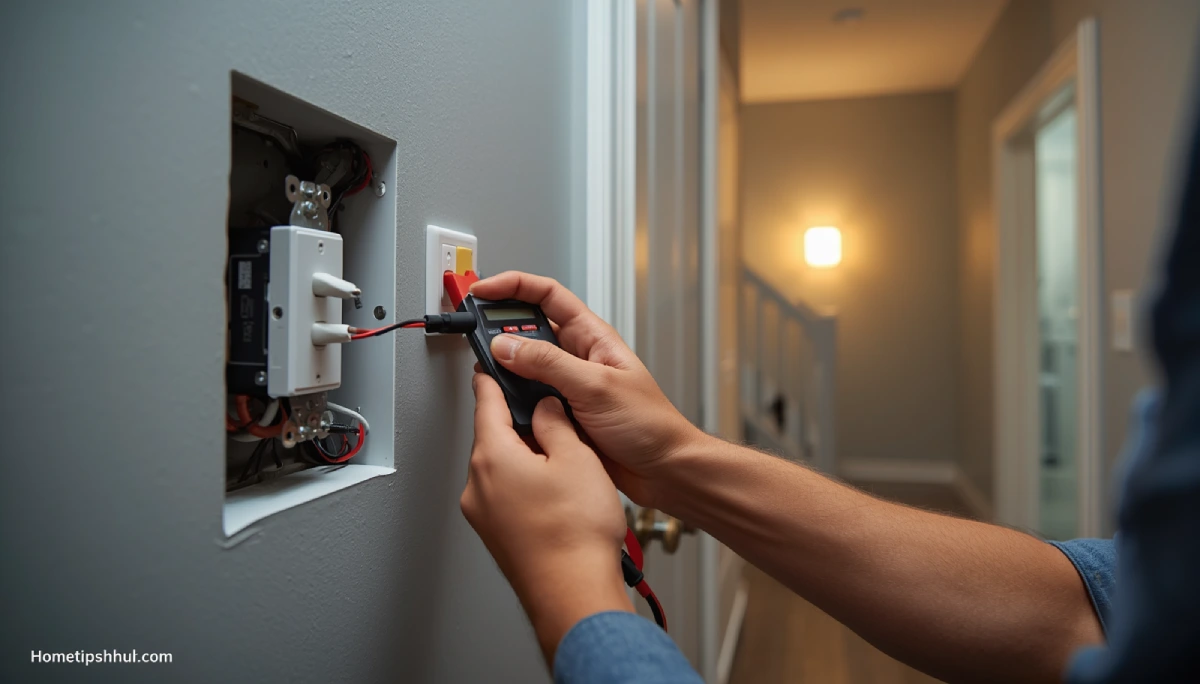
Step 1: Turn Off the Power
Go to your circuit breaker panel and switch off the breaker for the circuit you’re working on. Use your non-contact voltage tester at the switch box to confirm zero voltage. This step is not optional — it’s what keeps you safe.
Step 2: Identify Your Wires
Open both switch boxes and identify your wires. Look for:
- Black wire — usually the hot/power wire
- White wire — neutral (sometimes used as a traveler wire in older homes, marked with black tape)
- Red wire — second traveler wire
- Bare copper — ground wire
Label each wire with tape if needed. Confusion here leads to a switch that doesn’t work — or worse.
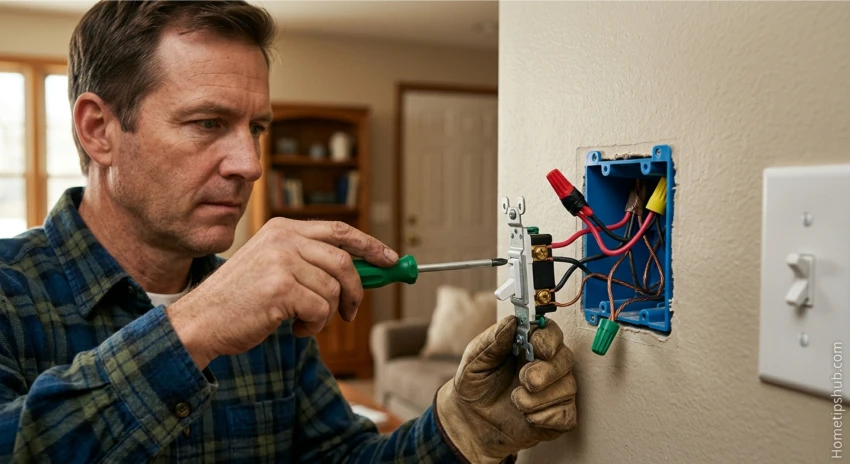
Step 3: Connect the First Switch
At the switch receiving power from the breaker panel:
- Connect the hot black wire to the common terminal (black screw)
- Connect one traveler wire to each traveler terminal (brass/silver screws)
- Connect the ground wire to the grounding screw
Step 4: Connect the Second Switch
At the switch nearest the light fixture:
- Connect the wire going to the fixture to the common terminal
- Connect the same traveler wires (red and black) to the traveler terminals — matching the same colors as the first switch
- Connect the ground wire to the grounding screw
Step 5: Connect the Light Fixture and Test
Wire your light fixture using the black (hot) wire from the second switch’s common terminal and the white neutral wire from the power source. Restore power at the breaker panel and test both switches. The light should toggle on and off from either location.
Common 3 Way Switch Wiring Mistakes to Avoid
Even experienced DIYers make mistakes with 3 way switch wiring. Here are the most common problems — and how to avoid them.
Mistake 1: Mixing Up the Common Terminal
Connecting a traveler wire to the common terminal is the #1 error. Always identify the common screw (it’s darker than the others) before connecting anything.
Mistake 2: Reversing the Traveler Wires at One Switch
The traveler wires must match on both switches. If you connect red to terminal A on switch one, connect red to terminal A on switch two as well. Reversing them causes the switch to work backwards — or not at all.
Mistake 3: Forgetting the Ground Wire
Skipping the ground wire is a code violation and a safety hazard. Always connect the bare copper grounding wire to the green screw on each switch.
Mistake 4: Not Testing Before Closing the Box
Always test with power on before screwing the switches back into the wall box. It’s much easier to fix a wiring error when wires are accessible.
Mistake 5: Using Wrong Cable Type
3 way switch wiring requires 14/3 or 12/3 cable between the two switches. Using 14/2 cable gives you only one traveler wire — which isn’t enough. Always check your cable type before purchasing.
3 Way Switch Wiring for Smart Home Devices
More homeowners are upgrading to smart switches, and 3 way switch wiring plays a big role. Here’s what you need to know when swapping traditional switches for smart home options.
Do Smart Switches Need a Neutral Wire?
Most smart switches require a neutral wire at the switch box. Traditional 3 way switch wiring sometimes doesn’t route the neutral to the box. Before purchasing, check if your switch box has a neutral wire — it’s usually white and bundled together with wire nuts in the back of the box.
Using One Smart Switch and One Auxiliary Switch
Many smart switch brands require one smart main switch and one auxiliary switch (sometimes called an “add-on” switch). You don’t use two identical smart switches. The auxiliary switch communicates with the main via the traveler wire or wirelessly.
Popular Smart Switch Brands for 3 Way Setups
- Lutron Caseta — works without a neutral wire
- Leviton Decora Smart — requires neutral in most models
- Kasa Smart (TP-Link) — budget-friendly option
- GE Enbrighten — widely available at hardware stores
Upgrading your 3 way switch wiring to smart controls is one of the best home improvement investments you can make for convenience and energy savings.
Troubleshooting 3 Way Switch Wiring Problems
Something not working after your 3 way switch wiring project? Don’t panic. Most problems have simple fixes.
Light Doesn’t Turn On at All
- Check that the circuit breaker is on
- Verify the common terminal connections at both switches
- Test your light bulb — it might just be burned out
Light Works from One Switch But Not the Other
- One set of traveler wires may be reversed or disconnected
- Check that both traveler terminals are firmly connected at both switches
- Look for a loose wire or a wire that slipped out of a terminal
Switch Feels Warm or Sparks
Turn off power immediately. This often means:
- A wire is loose and arcing
- The switch is overloaded beyond its amperage rating
- You may need a higher-rated switch or to consult an electrician
Light Flickers Intermittently
- Check for a loose neutral wire at the fixture
- Make sure wire nuts are tight on all connections
- If using LED bulbs, ensure they’re rated for 3 way switch use — some older LEDs flicker on 3 way circuits
FAQ: 3 Way Switch Wiring Questions Answered
Q1: What is the difference between a 3 way switch and a regular switch?
A regular single-pole switch has two terminals and controls a light from one location only. A three-way switch has three terminals — a common terminal and two traveler terminals — allowing you to control the same light fixture from two different spots. The key difference is the extra traveler wire that runs between the two three-way switches, enabling them to communicate and toggle the light regardless of which switch you use.
Q2: Which wire goes to the common terminal on a 3 way switch?
At the first switch (the one getting power), the hot black wire from the breaker panel connects to the common terminal. At the second switch (the one near the fixture), the wire running to the light fixture connects to the common terminal. The common terminal is typically identified by its dark-colored (black or dark brass) screw — never connect a traveler wire here.
Q3: Can I do 3 way switch wiring without a neutral wire?
In traditional 3 way switch wiring, the neutral wire goes directly to the light fixture and doesn’t need to pass through the switch boxes. So yes, you can wire the switches without a neutral. However, if you’re installing smart switches, most require a neutral at the box. Lutron Caseta is a popular exception — it works without a neutral wire and is a great choice for smart home upgrades.
Q4: How many wires does a 3 way switch wiring setup require?
A standard 3 way switch wiring circuit uses 14/3 cable (or 12/3 cable for 20-amp circuits) between the two switches. This cable contains four wires: black, white, red, and bare copper ground. Between the power source and the first switch, and between the second switch and the light fixture, regular 14/2 or 12/2 cable is used. In total, you’ll have at least two traveler wires, one common wire, one neutral wire, and a ground wire.
Q5: Is 3 way switch wiring safe for a DIY project?
3 way switch wiring is a manageable DIY task for most homeowners — as long as you follow safety rules. Always turn off the circuit breaker and verify with a voltage tester before touching any wires. Use the correct cable type, connect the ground wire, and follow NEC wiring guidelines. If at any point you feel unsure, calling a licensed electrician is always the smart choice. Safety comes first in every home electrical project.
Conclusion: Master 3 Way Switch Wiring with Confidence
3 way switch wiring doesn’t have to be intimidating. With the right tools, a clear understanding of the common terminal and traveler wires, and a step-by-step approach, you can tackle this project safely and successfully.
To recap: always cut power first, identify your wires carefully, connect the hot wire to the common terminal at switch one, connect the traveler wires to both switches, and connect the fixture wire at the common terminal of switch two. Test before closing the boxes, and you’re done.
Whether you’re controlling a staircase light, a hallway, or upgrading to a smart switch system, mastering 3 way switch wiring gives you real control over your home’s electrical system. Start with confidence, take it step by step, and you’ll have it working perfectly.
Ready to get started? Grab your tools, shut off that breaker, and take control of your lighting today!