
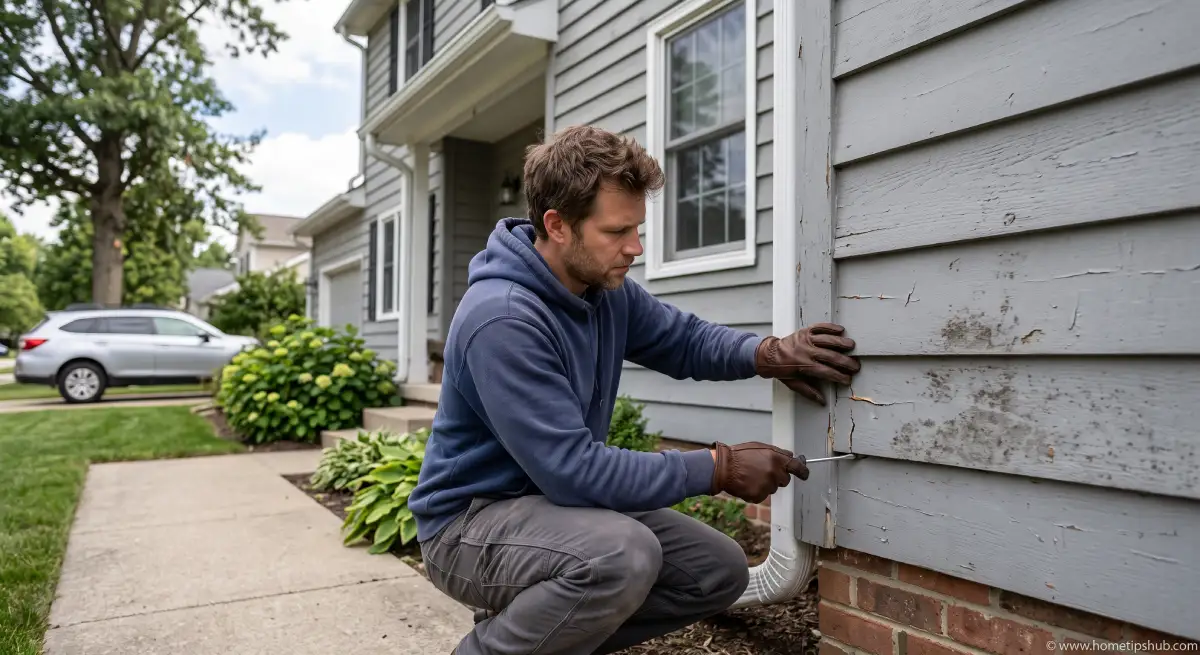
If you’ve noticed cracked boards, peeling paint, or soft, spongy spots near the bottom of your house, you’re not alone. Wood siding repair is one of the most common home maintenance projects for homeowners across the United States, and the good news is that most issues can be fixed without calling in a contractor — as long as you know what you’re doing.
This guide walks you through everything you need to know about wood siding repair, from spotting early warning signs to choosing the right wood filler for siding, budgeting for the project, and deciding when a DIY fix makes sense versus when to bring in a pro. Whether you’re dealing with a single rotted board or planning a full replacing wood siding project, these nine secrets will help you get professional-looking results.
By the end of this article, you’ll understand:
- How to diagnose common siding problems before they spread
- Step-by-step methods for repairing wood siding yourself
- The real wood siding repair cost you should budget for
- Tools, fillers, and putty options that actually hold up
- When wood siding repair near you is the smarter choice
Let’s get started.
Why Wood Siding Repair Matters More Than You Think
Wood siding gives homes a warm, classic look that vinyl and fiber cement simply can’t replicate. But wood is a natural material, and that means it’s vulnerable to moisture, insects, sun exposure, and temperature swings. Left unaddressed, small problems turn into expensive ones fast.
A neglected crack the size of a coin can let water seep behind the boards, leading to hidden rot, mold growth, and even structural damage to your home’s frame. That’s why timely wood siding repair isn’t just a cosmetic fix — it’s a protective measure that extends the life of your entire exterior wall system.
Homeowners who stay on top of exterior wood siding repair typically spend far less over time than those who wait until damage becomes severe. A $50 repair today can prevent a $5,000 replacement job five years down the road.
Secret #1: Know the Warning Signs Before They Get Worse
Before you can start repairing wood siding, you need to know what to look for. Here are the most common red flags:
- Peeling or bubbling paint — often the first visible sign of moisture trapped underneath
- Soft or spongy boards — press with a screwdriver; if it sinks in easily, you likely have rot
- Visible cracks or splits — usually caused by sun exposure or age
- Wood siding rotting at bottom of the wall — this is extremely common because bottom boards sit closest to splashing rain, sprinklers, and snow melt
- Small holes — could indicate insect activity like carpenter bees or termites
- Warping or buckling — a sign of long-term moisture exposure
Catching these signs early makes wood siding repair dramatically simpler and cheaper.
Where Damage Typically Starts
| Common Damage Location | Likely Cause | Repair Difficulty |
|---|---|---|
| Bottom of siding boards | Splashback, poor drainage, snow contact | Moderate to High |
| Around windows/doors | Failed caulking, water intrusion | Low to Moderate |
| Corners and seams | Gaps allowing moisture entry | Low |
| Under gutters/downspouts | Overflow or leaks | Moderate |
| South/west-facing walls | UV exposure, sun damage | Low |
Secret #2: Gather the Right Tools and Materials First
A successful wood siding repair project depends heavily on preparation. Rushing to the hardware store mid-project wastes time and often leads to mismatched materials.
Here’s a basic checklist for most repairing wood siding projects:
- Pry bar and hammer
- Circular saw or oscillating multi-tool
- Wood siding repair kit (many all-in-one kits include filler, hardener, and finishing tools)
- Exterior-grade wood filler for siding
- Wood siding repair putty for smaller cracks
- Epoxy consolidant for rotted areas
- Caulk and caulking gun
- Exterior primer and paint
- Sandpaper (medium and fine grit)
- Safety gloves and goggles
Investing in a quality wood siding repair kit upfront often saves money compared to buying individual products separately, especially if you anticipate future touch-ups.
Secret #3: Choose the Right Filler or Putty for the Job
One of the biggest mistakes homeowners make during wood siding repair is using the wrong product for the type of damage.
Wood filler for siding works best for:
- Small to medium holes
- Nail holes and minor gouges
- Surface-level imperfections before painting
Wood siding repair putty is ideal for:
- Fine cracks and hairline splits
- Areas that need a flexible, paintable finish
- Small cosmetic repairs that don’t involve structural weakness
Epoxy wood consolidant and filler systems are the go-to choice for:
- Rotted wood that’s still structurally salvageable
- Larger areas of decay
- Situations where you want a permanent, weatherproof bond
For anything larger than a few inches of rot, filler alone won’t cut it — you’ll need to cut out the damaged section and follow proper replacement steps, which we cover next.
Filler and Putty Comparison
| Product Type | Best Use Case | Dry Time | Paintable | Durability |
|---|---|---|---|---|
| Wood filler for siding | Small holes, nicks | 1–2 hours | Yes | Moderate |
| Wood siding repair putty | Hairline cracks | 15–30 minutes | Yes | Moderate |
| Epoxy consolidant + filler | Rotted or soft wood | 24 hours cure | Yes | High |
| Two-part exterior wood epoxy | Structural gaps | 24–48 hours cure | Yes | Very High |
Secret #4: How to Repair a Rotted Board Step by Step
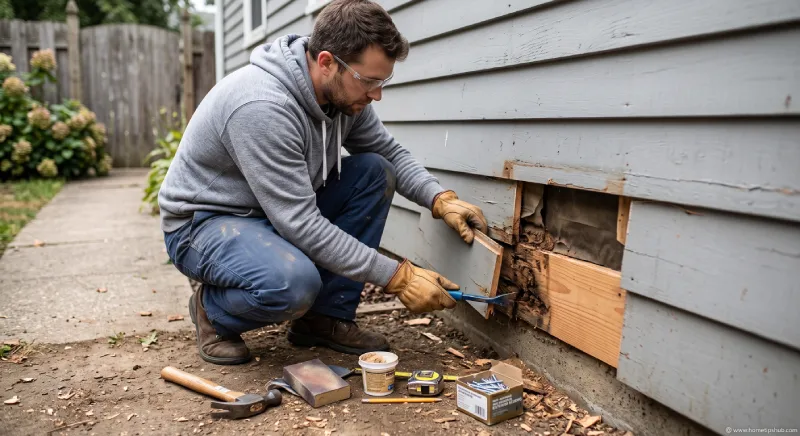
Wood siding rotting at bottom edges is the most frequently reported issue homeowners search for, so let’s break down the process in detail.
- Identify the full extent of the rot. Probe surrounding wood with a screwdriver to find where solid wood begins.
- Remove the damaged section. Use a circular saw or oscillating tool to cut out the rotted portion cleanly, extending slightly into healthy wood.
- Treat the area. Apply a borate-based wood preservative to prevent future fungal growth.
- Fill or replace. For minor rot, apply epoxy consolidant followed by filler. For larger sections, cut a matching replacement board.
- Sand smooth. Once cured, sand the area flush with surrounding siding.
- Prime and paint. Always prime bare wood before painting to seal out moisture.
- Seal the seams. Apply exterior caulk around edges to prevent water re-entry.
This process applies whether you’re doing a small patch job or working through a full exterior wood siding repair on multiple boards.
Secret #5: Replacing Wood Siding — When Repair Isn’t Enough
Sometimes a board is too far gone to save. If more than 30-40% of a board’s surface is compromised, replacing wood siding is usually more cost-effective than patching it repeatedly.
Here’s how to change siding on a house when full board replacement is necessary:
- Locate the damaged board and identify nail placement on boards above and below it
- Carefully pry the damaged board free, working from the bottom edge upward
- Remove any remaining nails or staples
- Cut a new board to match the exact dimensions and profile
- Treat the back of the new board with primer before installation
- Nail the new board into place following the original nailing pattern
- Caulk seams, prime, and paint to match existing siding
Matching the existing wood species, thickness, and profile is critical — mismatched boards create visible seams that stand out and can trap moisture over time.
Secret #6: Understanding Wood Siding Repair Cost
One of the most common questions homeowners ask is how much wood siding repair actually costs. Pricing varies based on damage severity, board accessibility, and whether you DIY or hire a professional.
| Repair Type | DIY Cost (Materials) | Professional Cost |
|---|---|---|
| Small crack/hole filler repair | $10–$30 | $150–$300 |
| Single board replacement | $30–$80 | $250–$500 |
| Rot repair (moderate area) | $50–$150 | $400–$800 |
| Multiple board replacement | $150–$400 | $800–$2,500 |
| Full section/wall repair | $400–$1,000+ | $2,500–$6,000+ |
Labor typically makes up the largest share of professional wood siding repair cost, which is why many homeowners choose to handle smaller repairs themselves and reserve professional help for extensive damage or hard-to-reach areas.
Secret #7: Prevent Future Damage After Repair
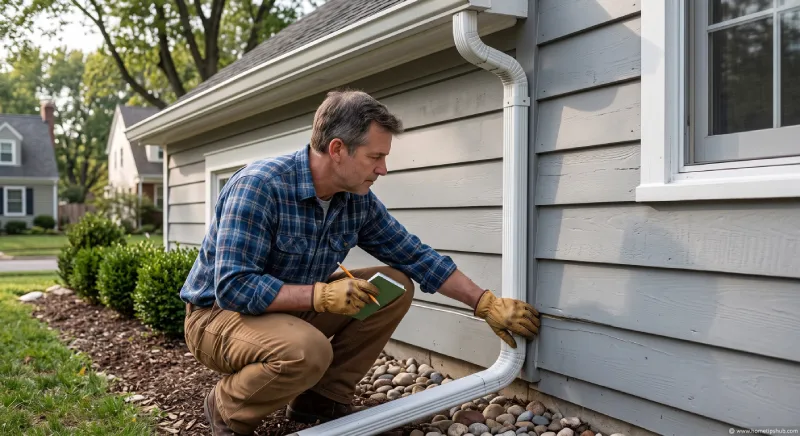
Completing a repair is only half the job — protecting your investment matters just as much. After any wood siding repair, take these preventative steps:
- Re-caulk seams annually, especially around windows and doors
- Keep gutters clean to prevent overflow onto siding
- Trim back shrubs and trees to improve airflow and reduce moisture retention
- Repaint or reseal every 3-5 years depending on climate
- Inspect the bottom of siding boards each spring and fall for early rot signs
A little routine maintenance goes a long way toward avoiding repeat repairing wood siding projects.
Secret #8: DIY vs. Hiring a Professional
Not every project is a good DIY candidate. Use this quick guide to decide:
DIY-friendly projects:
- Small cracks or holes
- Cosmetic touch-ups
- Single accessible board replacement
- Caulking and repainting
Call a professional for:
- Widespread rot affecting multiple walls
- Structural damage behind the siding
- Second-story or hard-to-reach repairs
- Mold or pest infestations
- Insurance claim documentation needs
If you’re searching for wood siding repair near Punjab or wood siding repair near Ludhiana, Punjab, local contractors familiar with regional humidity and climate patterns can offer guidance suited to that environment, while homeowners across the U.S. can typically find qualified exterior repair specialists through local directories or home improvement marketplaces.
Secret #9: Long-Term Value of Proper Wood Siding Repair
Homes with well-maintained wood siding tend to hold curb appeal and resale value better than those with visible, neglected damage. Buyers and appraisers notice exterior condition immediately, and a home with fresh, properly repaired siding signals that the rest of the property has likely been well cared for too.
Whether you’re doing minor touch-ups or a complete replacing wood siding project, consistent maintenance protects both your home’s structure and its market value.
Learn more about seasonal home maintenance checklists and exterior care tips in our related guides.
Frequently Asked Questions
What is the fastest way to fix small holes in wood siding?
Clean the area, apply exterior wood filler for siding with a putty knife, let it cure, then sand and paint. Most small holes can be fixed in under an hour.
How do I know if my siding needs repair or full replacement?
If less than a third of a board is damaged and the wood is still firm around the affected area, repair is usually sufficient. Extensive softness, crumbling, or damage across multiple boards typically calls for replacement.
Can I repair wood siding rotting at the bottom myself?
Yes, for moderate rot. Remove the damaged material, treat with a wood preservative, apply epoxy filler, sand, and repaint. Severe structural rot near the foundation line should be evaluated by a professional.
What’s the average wood siding repair cost for a typical homeowner?
Most single-board repairs cost between $30 and $150 in DIY materials, while professional repairs for the same job typically run $250 to $500 depending on location and accessibility.
How often should wood siding be inspected?
Twice a year — ideally in spring and fall — to catch moisture damage before winter or summer weather makes it worse.
Final Thoughts: Take Control of Your Wood Siding Repair Project
Wood siding repair doesn’t have to be intimidating. With the right tools, the correct filler or putty for the job, and a clear step-by-step approach, most homeowners can tackle everything from minor cracks to rotted boards without hiring outside help. And when the damage is beyond a weekend project, knowing when to call a professional saves both time and money.
Ready to restore your home’s exterior? Start with a thorough inspection this weekend, gather your materials, and tackle one board at a time. Your siding — and your home’s curb appeal — will thank you.
If you found this guide helpful, share it with a fellow homeowner tackling their own wood siding repair project, or explore our other exterior maintenance guides to keep your home in top shape year-round.