

Is your ceiling fan wobbling, making strange noises, or spinning slower than it used to? You’re not alone.
Ceiling fan maintenance is one of the most overlooked home tasks — and skipping it costs you money and comfort every single day. A poorly maintained fan works harder, uses more electricity, and wears out faster.
The good news? Keeping your fan in top shape is easier than you think. This guide walks you through every proven step so your fan runs quietly, efficiently, and safely for years to come.
Why Ceiling Fan Maintenance Matters More Than You Think
Most people only think about their ceiling fan when something goes wrong. But by then, the damage is often already done.
Regular ceiling fan maintenance helps you catch small problems before they turn into expensive repairs. A loose blade bracket, for example, can cause wobbling — which strains the motor and shortens the fan’s life significantly.
Beyond repairs, fan efficiency plays a big role in your energy bills. A clean, well-balanced fan moves air more effectively, which means your air conditioner doesn’t have to work as hard. According to the U.S. Department of Energy, ceiling fans can make a room feel up to 4°F cooler, letting you raise your thermostat and save energy.
Think of ceiling fan maintenance the same way you think about changing your car’s oil — it’s a small effort that prevents massive headaches later.
The Real Cost of Neglecting Your Fan
- Increased electricity bills from an overworked motor
- Premature fan motor burnout
- Annoying wobbling and clicking noises
- Dust buildup that worsens indoor air quality
- Safety risks from loose blades or faulty wiring
How Often Should You Do Ceiling Fan Maintenance?
This is one of the most common questions homeowners ask — and the answer depends on your environment and how often you use your fan.
As a general rule, light cleaning should happen every 2–4 weeks, while deep ceiling fan maintenance is best done every 3–6 months. If you live in a dusty area or have pets, bump that up to monthly deep cleans.
Here’s a simple schedule to follow:
| Task | Frequency | Time Required |
|---|---|---|
| Wipe fan blades with cloth | Every 2–4 weeks | 5–10 minutes |
| Check and tighten screws | Every 3 months | 10 minutes |
| Lubricate the motor (if needed) | Once a year | 15–20 minutes |
| Balance fan blades | Every 6 months | 20–30 minutes |
| Inspect wiring and connections | Once a year | 15 minutes |
| Clean light kit and globes | Monthly | 10 minutes |
| Full deep clean + inspection | Twice a year | 45–60 minutes |
Sticking to this schedule makes ceiling fan maintenance feel effortless instead of overwhelming.
Gathering the Right Tools Before You Start
Before you climb that ladder, make sure you have everything ready. Having the right tools saves time and keeps you safe.
Essential Ceiling Fan Maintenance Tools
- Microfiber cloth – Traps dust without spreading it around
- Extendable duster – Perfect for quick between-cleans wipe-downs
- Screwdriver set – Phillips and flathead for tightening screws
- Step ladder – Always use a stable one; never stand on chairs
- Mild dish soap + warm water – For removing grease and stubborn grime
- Blade balancing kit – Fixes wobbling without guesswork
- Non-detergent motor oil – For lubricating the fan motor bearings
- Voltage tester – Essential for checking wires safely
Pro tip: Place an old pillowcase over each fan blade before wiping it. When you pull the pillowcase off, it captures all the dust inside — no mess on your floors or furniture.
Step-by-Step Ceiling Fan Maintenance Process
Now let’s get into the actual work. Follow these steps in order for the best results.
Step 1: Turn Off the Power
Always start here. Switch the fan off at the wall and, for deep maintenance, turn off the circuit breaker too. Use a voltage tester to confirm there’s no live current before touching any wiring. Electrical safety is non-negotiable.
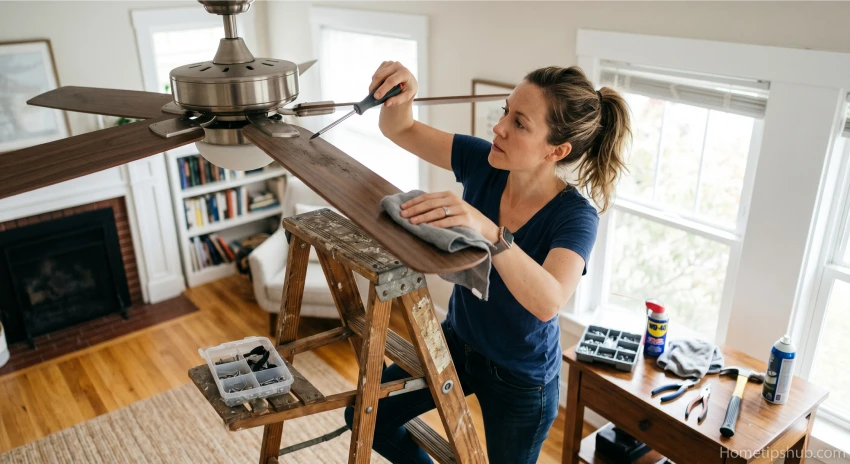
Step 2: Clean the Fan Blades
Dust builds up fast on fan blades, especially on the top surface where it’s hard to see. Use your pillowcase trick or a damp microfiber cloth to wipe each blade thoroughly. For sticky grime, mix a few drops of mild dish soap with warm water. Dry each blade completely before turning the fan back on — moisture can warp wood or composite blades over time.
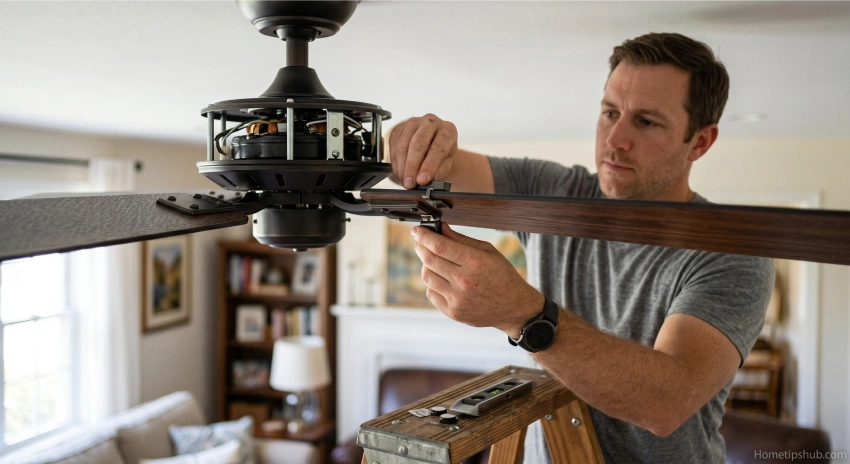
Step 3: Clean the Motor Housing and Light Kit
Wipe down the motor housing with a dry cloth. Never spray liquid directly onto the motor. If your fan has a light kit, remove the globes carefully, wash them with soapy water, and let them dry fully before replacing.
Step 4: Tighten All Screws and Bolts
This step often gets skipped — and it’s one of the most important parts of ceiling fan maintenance. Grab your screwdriver and tighten:
- Blade bracket screws
- The canopy screws at the ceiling
- The mounting bracket bolts
- Light kit screws
Loose screws are the number one cause of wobbling and rattling noises.
Step 5: Check and Balance the Blades
Unbalanced blades put stress on the fan motor and cause annoying wobbling. A blade balancing kit (usually under $5) includes small weights you clip onto blades to even them out. Most wobbling issues disappear with just one or two small adjustments.
Step 6: Lubricate the Motor (If Your Fan Needs It)
Not all fans need oiling — check your owner’s manual first. Older fans with an oil reservoir near the motor housing do need periodic lubrication. Use a non-detergent oil (like 3-in-1 motor oil) and add just 1–2 ounces per year. Over-oiling can damage the motor, so less is more here.
Step 7: Reverse the Blade Direction Seasonally
This is one of the smartest and most underused ceiling fan maintenance tips. In summer, set your fan to spin counterclockwise — this pushes cool air down. In winter, flip it to clockwise at low speed to push warm air down from the ceiling, improving heating efficiency. Most fans have a small direction switch on the motor housing.
Fixing Common Ceiling Fan Problems
Even with regular ceiling fan maintenance, issues can pop up. Here’s how to handle the most common ones quickly.
Why Is My Ceiling Fan Wobbling?
Wobbling usually comes from loose screws, unbalanced blades, or a blade that’s slightly bent or warped. Start by tightening all screws, then check if any blade sits at a different height than the others. Use a blade balancing kit if needed.
Why Is My Ceiling Fan Making Noise?
Clicking or humming noises usually mean:
- Loose screws vibrating during operation
- A blade that’s hitting the light kit
- The motor needs lubrication
- A faulty capacitor in the motor (requires professional help)
Most noise issues are fixed with a quick tighten-up and balance check.
Why Is My Ceiling Fan Running Slow?
A fan running at reduced speed is often a sign of a failing capacitor or dirty motor. Try cleaning the motor housing vents to improve airflow. If that doesn’t help, a licensed electrician should inspect the capacitor.
Outdoor Ceiling Fan Maintenance: Special Considerations
Outdoor fans face tougher conditions — moisture, insects, temperature swings, and UV exposure all take a toll.
For outdoor ceiling fan maintenance, use blades rated for damp or wet locations. Wipe blades more frequently (every 2 weeks in summer) and inspect the motor housing seal for cracks that let moisture in. Apply a light coat of car wax to metal parts to prevent rust.
Also check the fan’s mounting bracket more often outdoors, as temperature changes can cause hardware to loosen faster than indoors. Never use a standard indoor fan in a covered patio — it’s a safety hazard and voids the warranty.
Smart Ceiling Fan Maintenance Tips to Extend Fan Life
Want to get the most out of your ceiling fan investment? These expert-level tips make a big difference over time.
- Don’t run the fan in an empty room. Fans cool people, not rooms. This cuts energy waste and reduces motor wear.
- Keep the fan at medium speed when possible. High speed puts more stress on the motor and bearings.
- Check the ceiling mount annually for signs of stress cracks in the ceiling box.
- Replace worn pull chains before they break inside the switch housing — that’s a more expensive repair.
- Clean the remote control sensor on the motor housing if your remote stops working reliably.
- Consider upgrading to an energy-efficient DC motor fan if your current fan is more than 10–12 years old.
FAQ: Ceiling Fan Maintenance Questions Answered
Q1: How often should I perform ceiling fan maintenance?
For most homes, light cleaning every 2–4 weeks and a full ceiling fan maintenance check every 3–6 months works well. If you have pets or allergies, increase the frequency. Consistent upkeep is far easier than dealing with a broken fan in the middle of summer.
Q2: Do I need to oil my ceiling fan motor?
Not all ceiling fans require oiling — only older models with an oil reservoir port near the top of the motor housing. Check your owner’s manual. If your fan does need it, use a non-detergent oil annually. Modern sealed-bearing fans are self-lubricating and require no oiling at all.
Q3: What causes a ceiling fan to wobble, and how do I fix it?
Wobbling is most commonly caused by loose blade bracket screws, unbalanced blades, or a warped blade. Start by tightening all screws, then use a blade balancing kit to redistribute weight evenly. This simple ceiling fan maintenance step eliminates most wobble problems in under 30 minutes.
Q4: Can I clean my ceiling fan without taking it apart?
Yes! For routine ceiling fan maintenance, you don’t need to disassemble anything. Use the pillowcase trick to wipe each blade, a damp cloth for the motor housing, and a duster for the light kit. Only remove parts when doing a deep seasonal clean or addressing a specific problem.
Q5: Is ceiling fan maintenance different for outdoor fans?
Absolutely. Outdoor ceiling fan maintenance is more intensive because these fans deal with moisture, UV rays, and temperature swings. Use rust-resistant hardware, wipe blades every two weeks, apply wax to metal parts, and always use fans rated for damp or wet locations outdoors. Also inspect the mounting hardware more frequently.
Conclusion
Ceiling fan maintenance isn’t complicated — it just requires consistency. By cleaning your blades regularly, tightening screws, balancing blades seasonally, and lubricating the motor when needed, you’ll keep your fan running smoothly for 10–15 years or more.
Start with the basics: a clean microfiber cloth, a sturdy ladder, and a screwdriver. Then work your way up to the deeper seasonal checks. Small efforts now save you from costly repairs (or full replacements) down the road.
Your fan works hard to keep you comfortable. Return the favor with a little regular ceiling fan maintenance — and enjoy cooler air, lower energy bills, and a quieter, more efficient home all year long.
Ready to get started? Pick one task from the maintenance schedule above and do it today. Your fan (and your wallet) will thank you.