
If your yard floods after every rainstorm, you are not alone. Millions of homeowners deal with poor stormwater drainage, soggy lawns, and runoff that washes pollutants into local waterways. The good news? Learning how to create a rain garden can solve all of these problems — and make your yard look amazing in the process.
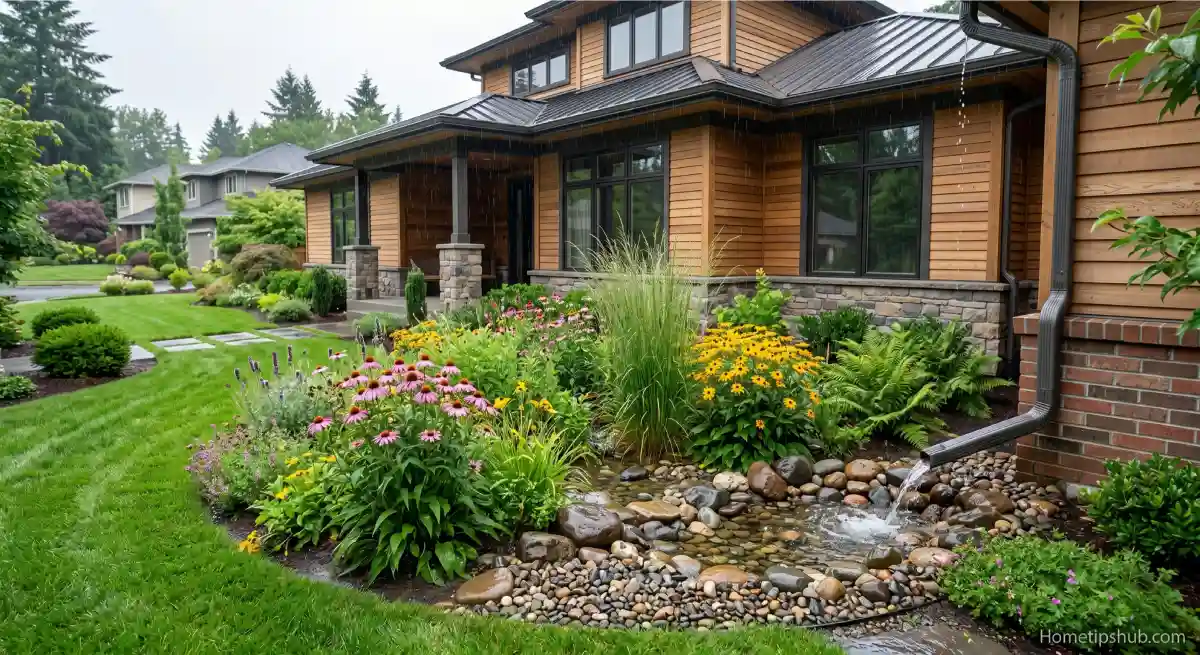
A rain garden is a shallow, planted depression that collects and absorbs stormwater runoff from roofs, driveways, and lawns. It is one of the smartest, most eco-friendly upgrades you can make to your property. In this guide, you will learn everything you need — from picking the right spot to choosing the best native plants — to build a rain garden that works beautifully.
What Is a Rain Garden and Why Should You Build One?
Before diving into how to create a rain garden, it helps to understand what makes it so powerful. A rain garden is not a pond. It does not hold standing water permanently. Instead, it is designed to absorb water within 24 to 48 hours, reducing runoff and recharging groundwater.
How Does a Rain Garden Help the Environment?
Rain gardens offer a long list of environmental benefits:
- They filter out pollutants like fertilizers, oil, and sediment before they reach streams.
- They reduce flooding and erosion in your yard and neighborhood.
- They support local wildlife, including birds, butterflies, and beneficial insects.
- They improve soil health through natural water cycling.
- They reduce the load on municipal stormwater systems.
According to landscape experts, a properly built rain garden can absorb up to 30% more water than a regular lawn patch of the same size. That is a powerful difference for both your yard and your local ecosystem.
Is a Rain Garden Right for Your Property?
Not every yard is a perfect candidate. Clay-heavy soils or areas with a high water table may need special amendments. But most homeowners — with a bit of planning — can successfully build one. If water pools in your yard for more than 24 hours after rain, a rain garden could be your best solution.
Step 1 — Choose the Best Location for Your Rain Garden

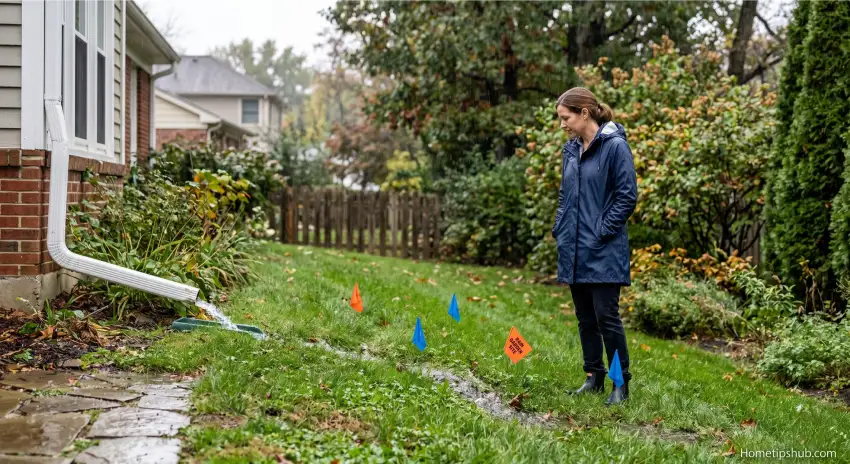
The first step in how to create a rain garden is finding the right spot. Location is everything. A poorly placed garden will either stay dry or turn into a mosquito breeding ground.
Where Should You Place a Rain Garden?
Here are the key placement rules to follow:
- At least 10 feet away from your home’s foundation to prevent basement flooding.
- At least 25 feet from a septic system for sanitary reasons.
- In a natural low point where water already flows during rain.
- Away from large tree roots that could interfere with digging.
- In an area that gets partial to full sun, since most rain garden plants thrive in sunlight.
Look outside during a rainstorm and watch where water naturally flows. That natural drainage path is often your best bet for placement. It is also smart to check that the area has enough natural slope (ideally 1–12% grade) to direct water into the garden without creating erosion.
Step 2 — Test Your Soil Drainage Before You Dig
Soil drainage is one of the most overlooked parts of learning how to create a rain garden. Even a perfectly placed garden will fail if your soil cannot absorb water fast enough.
How to Do a Simple Percolation Test
A percolation test (or perc test) tells you how fast your soil drains. Here is how:
- Dig a hole about 12 inches deep and 12 inches wide.
- Fill it with water and let it drain completely.
- Fill it again and measure how fast the water level drops.
- Aim for at least 0.5 inches per hour of drainage.
If your soil drains too slowly, you will need to amend it with a rain garden soil mix — typically a blend of 50–60% sand, 20–30% compost, and 20–30% topsoil. This improves permeability while still providing nutrients for plants.
Step 3 — Size and Shape Your Rain Garden Correctly
Getting the right size is a critical step in how to create a rain garden that performs well. Too small and it will overflow. Too large and it becomes unnecessarily expensive to plant and maintain.
Rain Garden Size Comparison Table
| Drainage Area (sq ft) | Recommended Garden Size | Approximate Depth |
|---|---|---|
| Up to 500 | 50–75 sq ft | 4–6 inches |
| 500–1,000 | 75–150 sq ft | 6–8 inches |
| 1,000–2,000 | 150–300 sq ft | 8–12 inches |
| 2,000+ | 300+ sq ft | 10–12 inches |
A general rule is that your rain garden should be about 10–20% of the size of the area draining into it. So if your roof drains 1,000 square feet of water toward one downspout, your garden should be at least 100–200 square feet.
What Shape Works Best?
Kidney, crescent, and oval shapes work great. They follow natural contours and look attractive in a landscape design. Avoid perfect squares or rectangles — they look unnatural and are harder to grade properly.
Step 4 — Dig and Grade the Rain Garden Basin
Now comes the physical work. Knowing how to create a rain garden means understanding how to shape the basin so water flows in, spreads out, and soaks in evenly.
How to Dig Your Rain Garden
- Remove any grass and sod from the designated area.
- Dig to your target depth (usually 6–12 inches) in the center.
- Slope the sides gradually — a 3:1 ratio (3 inches of run for every 1 inch of rise) works well.
- Create a flat, level bottom so water distributes evenly.
- Build a berm (small mound) on the downhill side to hold water in place.
Save the soil you dig out. You can use it to build up the downhill berm, which is a key structural feature of the garden.
Add an Overflow Channel
Every rain garden needs an overflow outlet for extremely heavy storms. Dig a shallow overflow channel on one side that directs excess water to a safe discharge area like a lawn, swale, or storm drain. Line it with river rock or gravel to prevent erosion.
Step 5 — Select the Right Rain Garden Plants
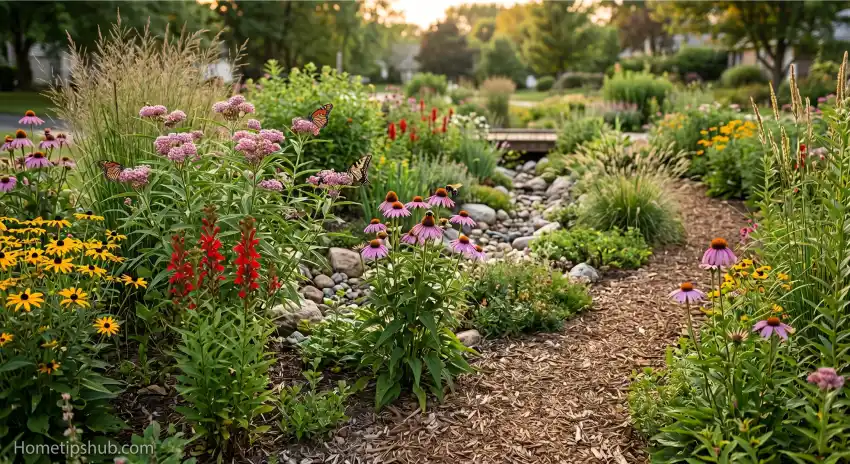
Choosing the right native plants is where your rain garden really comes to life. This step is one of the most exciting parts of learning how to create a rain garden.
What Plants Grow Best in Rain Gardens?
The best rain garden plants must tolerate two extremes: temporary flooding AND periods of drought. Native plants are perfectly adapted for this — they evolved with local weather patterns.
Best plants for the wet center zone:
- Blue flag iris (Iris versicolor)
- Swamp milkweed (Asclepias incarnata)
- Cardinal flower (Lobelia cardinalis)
- Sedges and rushes for texture
Best plants for the middle zone:
- Black-eyed Susan (Rudbeckia hirta)
- Prairie dropseed grass
- Wild bergamot (Monarda fistulosa)
Best plants for the dry outer edge:
- Little bluestem grass
- Coneflower (Echinacea purpurea)
- Butterfly weed (Asclepias tuberosa)
Plant in odd-numbered groupings of 3, 5, or 7 for a natural look. Space plants according to their mature spread — overcrowding creates competition and disease.
Step 6 — Mulch, Water, and Establish Your Rain Garden
Once your plants are in the ground, your job is to give them the best start possible. This phase of how to create a rain garden focuses on establishment.
How to Mulch a Rain Garden
Apply 2–3 inches of shredded hardwood mulch or wood chip mulch across the entire garden. Mulch does several important things:
- Reduces weed competition while plants establish.
- Keeps soil moisture stable between rain events.
- Prevents erosion on sloped sides.
- Improves the overall look of the garden.
Avoid rubber mulch or dyed products — they can leach chemicals and harm soil microorganisms.
Watering During the First Season
Even though a rain garden is designed to be low-maintenance landscaping, new plants need extra care during the first growing season. Water them deeply once or twice a week if there is no significant rainfall. After the first year, established native plants rarely need supplemental watering.
Step 7 — Maintain Your Rain Garden for Long-Term Success
One of the biggest advantages of learning how to create a rain garden is that long-term maintenance is minimal. Still, a few tasks each season will keep it looking great and functioning perfectly.
Seasonal Rain Garden Maintenance Checklist
Spring:
- Clear out any debris or sediment that accumulated over winter.
- Check the inlet and overflow channel for blockages.
- Divide overcrowded perennials and replant.
Summer:
- Pull weeds aggressively in the first two seasons while plants fill in.
- Monitor for standing water longer than 48 hours (may indicate compaction).
- Refresh mulch if it has thinned to less than 1 inch.
Fall:
- Leave seed heads and stems standing — they provide wildlife habitat and winter interest.
- Check the berm for any erosion and repair as needed.
Every Few Years:
- Aerate the soil in the basin if drainage slows.
- Add a thin layer of compost to refresh soil nutrients.
Frequently Asked Questions About How to Create a Rain Garden
How Deep Should a Rain Garden Be?
Most rain gardens are 6 to 12 inches deep at the center. The depth depends on your soil type and the size of the drainage area. Sandy soils can handle shallower depths because they drain faster, while clay soils need more depth and soil amendment to work effectively. Always pair depth with a percolation test for best results.
How Long Does It Take to Build a Rain Garden?
For an average-sized rain garden (100–200 sq ft), most homeowners complete the project in one to two weekends. The first weekend covers digging, grading, and soil preparation. The second weekend is for planting and mulching. Larger gardens or those needing significant soil amendment may take longer.
Do Rain Gardens Attract Mosquitoes?
This is a common concern, but a properly built rain garden will not breed mosquitoes. Mosquitoes need standing water for at least 7–10 days to complete their breeding cycle. A well-designed rain garden absorbs water within 24 to 48 hours, which is far too fast for mosquito larvae to develop.
Can I Create a Rain Garden in a Small Yard?
Absolutely! You can create a rain garden in small yards by simply scaling down the size. A mini rain garden as small as 25–50 square feet can still make a meaningful difference. Even a small garden connected to a single downspout can capture and filter a significant amount of stormwater runoff during each rain event.
How Much Does It Cost to Create a Rain Garden?
The cost of building a rain garden varies widely. A basic DIY rain garden using native plants sourced from a local nursery can cost as little as $100–$300 for a small garden. Larger gardens or those requiring professional grading and specialized soil mixes can run $1,000–$3,000 or more. Many local municipalities also offer rebate programs that offset part of the cost as an incentive for sustainable landscaping.
Conclusion: Start Building Your Rain Garden Today
Now you know exactly how to create a rain garden that looks beautiful, functions perfectly, and benefits your local environment. From choosing the right location and testing your soil to selecting stunning native plants and maintaining your garden season after season — every step is manageable, even for a first-time gardener.
The benefits are real and lasting. You will reduce flooding, support pollinators and wildlife, filter runoff before it reaches local waterways, and add genuine beauty to your property. Best of all, once your rain garden is established, it practically takes care of itself.
So grab a shovel, pick your spot, and start planning. Learning how to create a rain garden is one of the most rewarding weekend projects you can tackle this season. Your yard — and your local watershed — will thank you for it.