
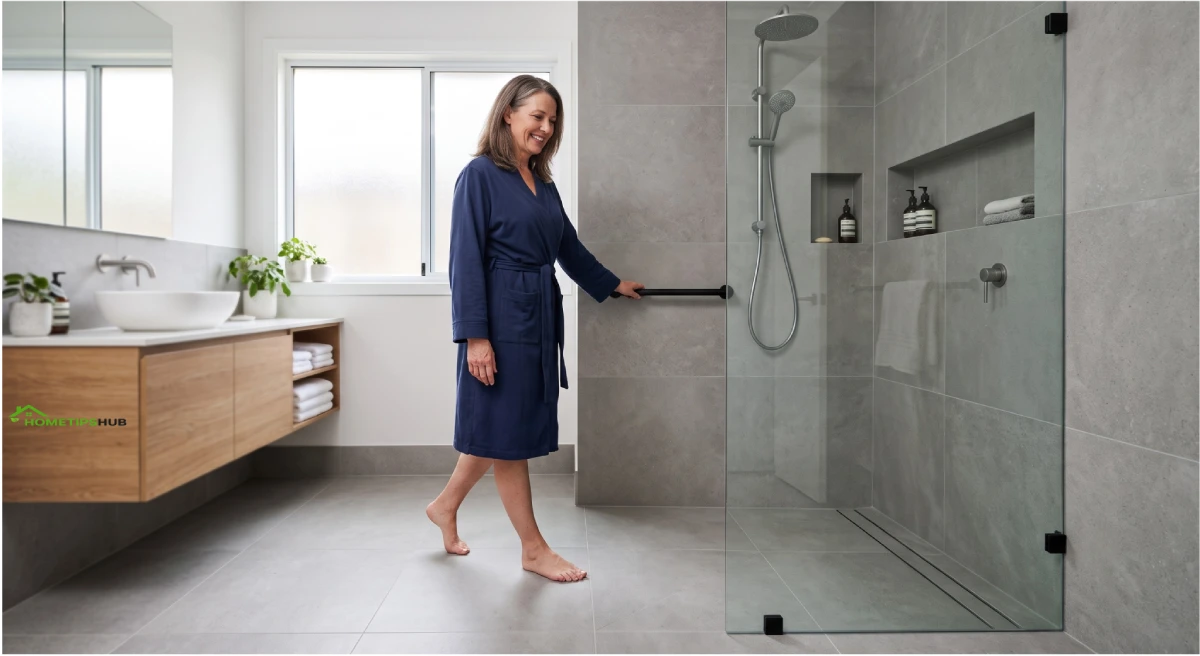
When it comes to bathroom renovations, few upgrades improve daily life as dramatically as installing a barrier free shower. Whether you’re designing an accessible space for a family member, planning ahead for aging in place, or simply wanting a sleek, modern bathroom aesthetic, understanding what makes an effective curbless design is essential.
A barrier free shower eliminates the traditional raised threshold that separates your bathroom floor from the bathing area. Also known as a zero-entry or threshold-free design, this simple but transformative approach creates a seamless transition that benefits everyone in your household, from young children to seniors and individuals with mobility challenges.
Beyond accessibility, these accessible bathing solutions offer surprising advantages: they make bathrooms feel larger, simplify cleaning, reduce tripping hazards, and provide a contemporary look that appeals to homebuyers. In this comprehensive guide, we’ll explore 25 innovative design ideas, discuss essential requirements, walk through installation steps, and help you determine whether a curbless design is right for your home.
What Exactly Is a Barrier Free Shower?
A curbless bathroom design eliminates the raised lip or threshold at the entrance, creating an accessible entry point for people of all abilities. Unlike traditional showers that require stepping up or over an edge, level-entry designs offer floor-level access that wheelchairs, walkers, shower chairs, and mobility aids can navigate without difficulty.
The most distinctive feature of any accessible shower is its pan—a sloped surface that gradually directs water toward a strategically placed drain. This slope is barely perceptible to the eye but essential for proper drainage, ensuring water flows efficiently rather than pooling on your bathroom floor.
Key characteristics of these accessible designs include:
- Sloped flooring directing water to an off-set drain
- No raised threshold or curb at the entrance
- Spacious layout (typically at least 36 by 36 inches minimum for wheelchair accessibility)
- Grab bars positioned for safety and support
- Non-slip flooring materials
- Easy-access controls and fixtures
- Optional bench seating for bathing comfort
For seniors and individuals with limited mobility, a barrier free shower transforms the daily bathing experience from stressful to manageable. The absence of a high step eliminates a major fall risk while the spacious layout accommodates caregivers if assistance is needed.
Understanding Barrier Free Shower Requirements
Building a compliant, functional accessible design requires attention to specific measurements and safety standards. While requirements can vary by location, most codes follow the Americans with Disabilities Act (ADA) guidelines when designing these spaces.
ADA Compliance and Dimensions
A wheelchair accessible bathroom installation must meet minimum dimensional requirements for usability. These standards specify:
- Minimum floor space: 36 inches by 36 inches of clear space inside the bathing area
- Doorway width: At least 32 inches clear opening for wheelchair passage
- Grab bar placement: Vertical bars at the back wall (18 inches from the corner) and horizontal bars at 33-36 inches from the floor
- Bench depth: If included, should be 15-16 inches deep and mounted 17-19 inches high
- Drain positioning: Located away from the main entry to prevent water pooling
Slope Requirements for Proper Drainage
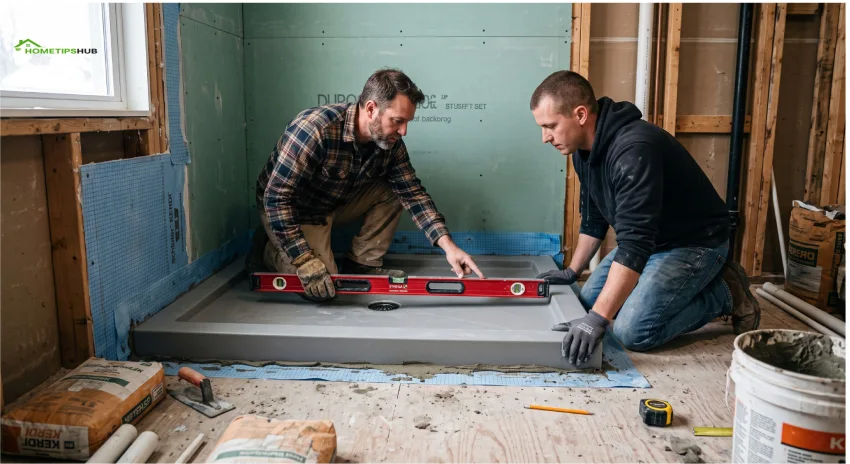
One of the most critical barrier free shower requirements is achieving proper slope. A curbless design needs to slope at approximately 1/4 inch per linear foot toward the drain. While this seems minimal, it’s the difference between a functioning bathroom and potential water damage.
This slope must be consistent across the entire bathing surface. Too steep, and the incline becomes noticeable and uncomfortable for walkers. Too shallow, and water won’t drain properly. Professional installation ensures this engineering requirement is met precisely.
Building Code Considerations
Before designing your accessible bathroom, consult local building codes and municipal requirements. Jurisdictions may have specific rules about:
- Waterproofing methods for level-entry designs
- Ventilation and moisture management
- Material specifications for non-slip surfaces
- Drain placement regulations
Barrier Free Shower Cost: What to Budget
One common question homeowners ask is, “What’s the cost of installing an accessible curbless bathroom?” The answer depends significantly on your choices regarding materials, labor, and whether you’re retrofitting an existing space or building new.
Cost Breakdown by Component
| Component | Budget Range | Notes |
|---|---|---|
| Barrier Free Shower Pan | $800–$2,500 | Prefab vs. custom installation; waterproofing included |
| Plumbing & Drain Work | $600–$1,500 | Relocation of existing drain may increase cost |
| Waterproofing Materials | $300–$800 | Membrane systems, sealants, and substrate prep |
| Tile & Flooring | $1,000–$3,000 | Material quality, size, and installation complexity |
| Fixtures & Hardware | $400–$1,500 | Grab bars, faucet, showerhead, and bench |
| Labor | $2,000–$5,000+ | Professional installation significantly improves longevity |
| Total Project Cost | $5,100–$14,300+ | Varies by project scope and location |
A prefabricated barrier free shower kit can help reduce costs significantly. These systems come with a pre-sloped pan, integrated drain, and waterproofing, reducing the complexity and labor involved. A basic kit typically runs $1,200–$2,800 and can be a practical solution for smaller bathrooms or budget-conscious renovations.
For those in Canada or other regions, expect variations of 15-25% based on local labor rates and material availability.
Barrier Free Shower Ideas: 25 Inspiring Layouts
Modern Minimalist Designs
Sleek concrete aesthetics have become increasingly popular for contemporary curbless bathrooms. Polished concrete floors with a linear drain create an industrial-chic look that feels both modern and functional. This style pairs beautifully with minimal fixtures and clean lines.
Glass enclosures are standard for level-entry designs, providing visual separation while maintaining the spacious feeling of a threshold-free layout. Frameless glass doors or walls extend the sight line, making even compact bathrooms feel expansive.
Luxurious Spa-Style Setups
Transform your daily routine with luxury accessible designs that rival high-end spas. Imagine stepping into a barrier free shower featuring:
- Rainfall showerheads combined with body jets
- Built-in benches with heated surfaces
- Steam functionality
- Multiple water controls at varying heights
- Decorative tile work creating visual interest
These upscale designs justify the higher investment through daily comfort and long-term property value increases.
Warm and Inviting Styles
Natural stone or large-format ceramic tiles create a warm aesthetic in curbless bathroom designs. Earthy tones like warm grays, terracotta, and cream establish a spa-like atmosphere that encourages relaxation.
Incorporating wood accents—perhaps a teak bench or wooden shelving—adds warmth without compromising waterproofing when properly sealed.
Small Bathroom Solutions
Not every home has spacious bathrooms. Accessible designs for compact spaces focus on:
- Compact corner configurations
- Wall-mounted fixtures to maximize floor space
- Minimal or no enclosure doors
- Light colors to enhance perceived space
- Narrow but functional layouts (32-36 inches wide)
Outdoor and Semi-Outdoor Concepts
Progressive homeowners embrace level-entry designs that blur indoor-outdoor boundaries. Pool houses, garden showers, and spa cabanas incorporating accessible principles create memorable bathing experiences.
Specialized Designs for Wheelchair Users
A wheelchair accessible bathroom requires specific adaptations:
- Extra-wide entry spaces (42-48 inches) for side transfers
- Reinforced grab bars rated for 300+ pounds of weight
- Floor-mounted instead of wall-mounted seating
- Controls positioned at varied heights (36-48 inches)
- Textured, slip-resistant surfaces throughout
Barrier Free Shower Installation: A Step-by-Step Guide

Planning and Preparation
Step 1: Assess Your Space Measure your current bathroom and determine if adequate space exists for an accessible design. Minimum dimensions are 36×36 inches, but 42×42 inches or larger provides comfort for extended use or caregiver assistance.
Step 2: Choose Your Accessible Solution Decide between a prefabricated system and a custom installation. Prefab options simplify installation but offer less design flexibility. Custom designs provide complete control over dimensions and aesthetics.
Step 3: Plan Waterproofing Strategy Waterproofing is non-negotiable for any curbless design. Your options include:
- Liquid membrane systems (most flexible)
- Waterproof sheet membranes
- Substrate boards with integrated waterproofing
- Traditional mud bed construction with drain pan
Step 4: Prepare the Subfloor Remove existing fixtures and flooring. Ensure the subfloor is level and structurally sound. If relocating plumbing, hire a licensed plumber.
Installation Process
| Installation Phase | Duration | Key Considerations |
|---|---|---|
| Demo & Prep | 1–2 days | Protect surrounding areas from debris and water damage |
| Plumbing Setup | 2–3 days | Install drain and water lines; test for leaks before waterproofing |
| Waterproofing | 2–3 days | Apply membranes with overlapping seams; cure time varies by product |
| Base Installation | 1–2 days | Set pre-sloped pan; ensure proper slope toward drain |
| Tile & Finishing | 3–7 days | Grout setting time requires patience; allow full cure before use |
| Hardware Installation | 1 day | Mount grab bars, install fixtures, apply finishes |
| Total Timeline | 10–18 days | Professional installation recommended for optimal results |
Professional vs. DIY Installation
Many homeowners wonder if accessible bathroom installation is a suitable DIY project. While it’s technically possible, the risks are significant:
DIY installation advantages:
- Potential cost savings ($2,000–$5,000 in labor)
- Full control over design and materials
- Personal satisfaction of completion
DIY installation drawbacks:
- Improper slope can cause water damage and mold
- Waterproofing mistakes lead to expensive repairs
- Plumbing requires licensed work in most jurisdictions
- Installation errors may void material warranties
Most experts recommend hiring professionals for the structural and waterproofing components while potentially handling cosmetic finishes yourself.
Barrier Free Shower Tile Ideas and Materials
Selecting the right tile impacts both aesthetics and functionality of your accessible space.
Best Tile for Accessible Bathrooms
Porcelain tile stands out as the top choice for these installations. Its dense composition resists water absorption, durability exceeds ceramic alternatives, and the variety of styles seems endless. Large-format porcelain tiles (12×24 inches or larger) create fewer grout lines, reducing maintenance concerns.
Natural stone options like slate and limestone offer luxurious appeal but require more maintenance due to porosity. These materials demand regular sealing to prevent water damage and staining.
Mosaic and glass tiles work well for accent areas and design elements, though their numerous grout lines can complicate cleaning.
Practical Tile Selection Ideas
- Neutral base: Large porcelain tiles in light gray or warm beige establish a spa-like foundation
- Textured accents: Add visual interest with subtle patterns or dimensional surfaces
- Contrast borders: Strategic stripes or borders in complementary colors define the space
- Linear drains: Complement modern design with straight-line drain channels
- Slip-resistant finishes: Ensure textured surfaces meet safety requirements
Waterproofing and Slope Requirements
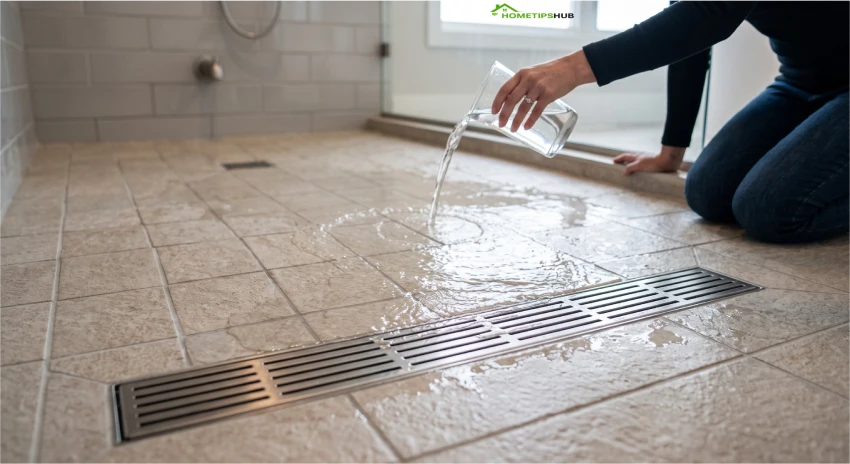
Moisture management separates successful installations from problematic renovations that develop mold and structural damage.
Waterproofing Best Practices
Multiple layers of protection:
- Substrate board with waterproofing integrated
- Liquid membrane over all surfaces
- Waterproof tape at seams and penetrations
- Grout sealant after installation
- Annual inspection and maintenance
Common waterproofing mistakes:
- Insufficient slope toward drain (leads to standing water)
- Incomplete membrane coverage (water finds tiny gaps)
- Poor grout selection (non-waterproof grout absorbs moisture)
- Skipping drain pan installation (backup prevention)
Slope Requirements Explained
The slope requirements might seem overly technical, but they’re fundamentally important. A slope of 1/4 inch per linear foot achieves proper drainage without being noticeable. This means:
- A 5-foot distance requires 1.25 inches of height change
- A 4-foot distance requires 1 inch of height change
This gradual descent guides water naturally toward the drain while maintaining comfortable, non-slippery walking surfaces.
Designs for Seniors: Age-Friendly Considerations
As we age, bathroom safety becomes increasingly important. Accessible bathroom designs address multiple mobility and safety concerns while maintaining dignity and independence.
Age-Friendly Features
Grab bars and handholds are non-negotiable. Research shows proper bar placement prevents nearly 80% of bathroom falls. Mount bars at 33-36 inches from the floor, with a 1.5-inch diameter for comfortable gripping.
Seating options like built-in benches or fold-down chairs allow for showering while seated—a safer option for seniors with balance concerns or limited endurance.
Temperature controls with anti-scald features prevent dangerous water temperature spikes that can cause burns, especially problematic for older adults with reduced temperature sensitivity.
Lighting and visibility improvements help seniors navigate safely. Installing bright, shadow-free lighting (ideally 90+ lumens per square foot) significantly improves confidence and safety.
Non-slip surfaces throughout the accessible area are essential. Even slight moisture can create hazards for older adults with reduced proprioception.
Maintenance and Long-Term Care
Regular Maintenance Schedule
Weekly tasks:
- Wipe down surfaces after use to prevent mold growth
- Squeegee or dry glass enclosures
- Clean drain area
Monthly maintenance:
- Deep clean grout lines with appropriate cleaner
- Inspect grout for cracks or deterioration
- Check grab bars for security and rust
Annually:
- Professional inspection of waterproofing and drain function
- Resealing grout if necessary
- Checking caulking around fixtures
Preventing Common Problems
Mold and mildew prevention: Ensure adequate ventilation with an exhaust fan running during and 30 minutes after use. Consider a moisture-sensing automatic fan.
Grout deterioration: Use epoxy-based grout rather than traditional cement grout. Epoxy resists moisture absorption and staining.
Drain clogs: Install a drain strainer to catch hair and debris. Clean regularly to maintain optimal water flow.
FAQ: Common Questions About Barrier Free Showers
Q: Can I convert my existing shower into a barrier free shower?
A: Yes, though it requires significant work. The primary challenge is achieving proper slope with a new sloped pan. Depending on your current layout, you may need to relocate plumbing and adjust subfloor levels.
Q: What’s the difference between a barrier free shower and a handicapped shower?
A: These terms are often used interchangeably, though “barrier free” emphasizes universal design benefiting everyone, while “handicapped shower” specifically addresses accessibility for individuals with disabilities. An accessible curbless design meets or exceeds accessibility standards for all users.
Q: How long does installation typically take?
A: A standard installation requires 10-18 days from start to finish, including curing times. Complex projects or custom designs may extend this timeline.
Q: Is a barrier free shower more expensive than a traditional shower?
A: Initial costs are typically 20-40% higher than basic shower installations due to specialized components and labor expertise required. However, long-term durability and property value appreciation often justify the investment.
Q: Can renters have accessible bathrooms installed?
A: Discuss options with your landlord or property manager. Some rental properties accommodate permanent adaptations, while others may approve temporary solutions like threshold ramps or portable grab bars.
Q: What’s the best flooring material for these designs?
A: Large-format porcelain tile in neutral colors with textured finishes offers the ideal combination of durability, safety, and aesthetics. Ensure a Coefficient of Friction (COF) rating of at least 0.60 for wet surfaces.
Conclusion: Creating Your Perfect Accessible Bathroom
A barrier free shower represents more than a bathroom upgrade—it’s an investment in safety, independence, and quality of life for you and your family. Whether you’re interested in curbless designs for seniors, wheelchair users, or simply prefer the clean aesthetics and functionality of a level-entry bathroom, the options available today are more beautiful and accessible than ever.
From luxurious spa-like retreats to practical, compact solutions for smaller homes, accessible designs can be customized to match your needs, budget, and style preferences. Understanding the requirements, costs, and installation processes empowers you to make informed decisions that will serve your household for decades.
The investment in proper waterproofing, appropriate slope, and quality materials ensures your installation remains functional and beautiful long-term. Whether you choose professional installation or tackle some components yourself, prioritize the engineering aspects that separate successful projects from problematic renovations.
Ready to Transform Your Bathroom?
Don’t let bathroom design challenges hold you back. Explore barrier free shower ideas that speak to you, consult with local contractors experienced in accessible bathroom installation, and begin planning your accessible, beautiful space today. Your future self—and any guests with mobility challenges—will appreciate the thoughtfulness and care you put into creating a truly inclusive environment.
Start your journey toward an accessible bathroom that enhances your home and improves your daily life. Contact local contractors for free consultations and estimates today.
Additional Resources
- ADA Accessibility Guidelines for Buildings and Facilities
- National Association of Home Builders (NAHB) Accessibility Standards
- Local building code requirements in your jurisdiction
- Certified Aging-in-Place Specialist (CAPS) associations
- Bathroom design retailers specializing in accessible fixtures