
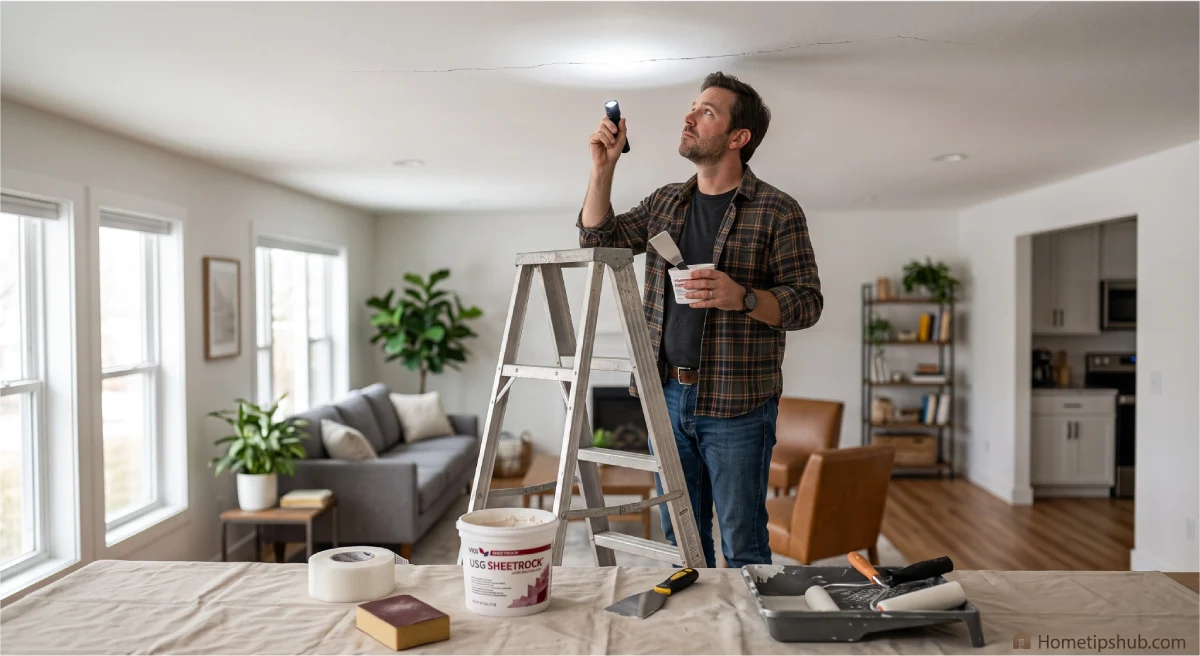
You’re lying on the couch, glance up, and there it is — a thin, jagged line running across your ceiling that definitely wasn’t there last month. Your first thought is probably somewhere between “is my house falling apart?” and “how much is this going to cost me?” Take a breath. In most cases, ceiling crack repair is a manageable project, and the crack itself is more cosmetic than catastrophic.
This guide walks you through everything you need to know about ceiling crack repair — from figuring out what’s causing the crack in the first place, to patching it yourself with basic tools, to knowing when it’s time to call in a professional. Whether you’re dealing with a hairline crack in a modern drywall ceiling or a stubborn split in a century-old plaster ceiling, you’ll find clear, actionable steps below. By the end, you’ll know exactly how to approach ceiling crack repair with confidence, and how to keep those cracks from coming back.
What Causes Cracks in Ceilings?
Before you pick up a putty knife, it helps to understand what causes cracks in ceilings, because the cause often determines the correct repair method. Not every crack is created equal, and treating a structural issue like a cosmetic one can lead to repeat repairs down the road.
Here are the most common culprits behind ceiling cracks:
- Normal house settlement — Homes shift slightly as the ground beneath them settles over the years. This is especially common in the first few years after construction and is usually harmless.
- Temperature and humidity changes — Materials like drywall, plaster, and wood framing expand and contract with seasonal changes, which can stress joints and seams.
- Poor drywall taping or plastering — If joint compound or plaster wasn’t applied correctly during the original build, cracks can appear along seams within a few years.
- Water damage — Leaking pipes, roof leaks, or condensation can weaken ceiling material, causing cracks, sagging, or discoloration.
- Structural movement or foundation issues — Larger, wider cracks (especially ones that run diagonally or grow over time) can signal foundation settlement or structural stress.
- Vibration — Heavy foot traffic upstairs, nearby construction, or even slamming doors can contribute to minor cracking over time.
Understanding what causes cracks in ceilings is the first real step toward effective ceiling crack repair — because a patch job on a structural crack is just a temporary fix.
When Should You Worry About Ceiling Cracks?
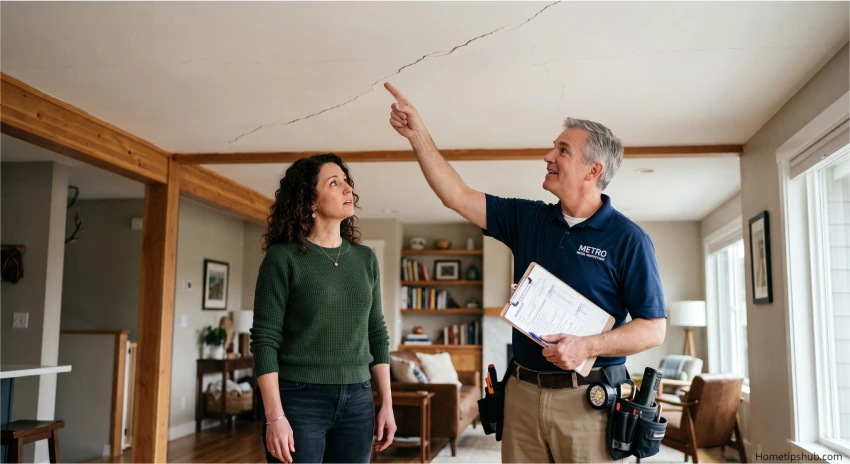
This is the question most homeowners actually want answered: is this crack dangerous, or just annoying? Here’s a direct answer for a quick read: most hairline ceiling cracks under 1/16 inch wide are cosmetic and not a structural concern, but cracks wider than 1/4 inch, cracks that run diagonally, or cracks accompanied by sagging or bulging should be inspected by a professional.
| Crack Type | Appearance | Likely Cause | Should You Worry? |
|---|---|---|---|
| Hairline crack | Thin, straight line | Settling, humidity changes | Usually no — cosmetic |
| Spider-web pattern | Multiple thin branching cracks | Poor plaster application, ceiling age | Rarely — mostly cosmetic |
| Straight crack along a seam | Follows drywall joint line | Tape/joint compound failure | No — easy DIY fix |
| Wide or diagonal crack | Over 1/4 inch, angled | Structural movement, foundation shift | Yes — call a professional |
| Crack with sagging or bulging | Ceiling appears to dip | Water damage, structural failure | Yes — urgent inspection needed |
| Crack near a water stain | Brown or yellow ring nearby | Roof or plumbing leak | Yes — fix the leak first |
If your crack matches any row in the “yes” category, pause your ceiling crack repair plans and get a licensed contractor or structural engineer to take a look before you paint over anything.
DIY Ceiling Crack Repair Without Professional Help
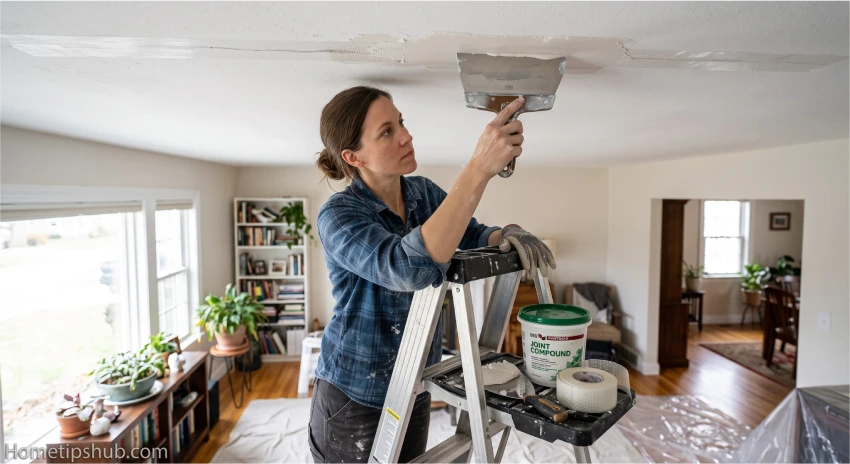
For the vast majority of hairline and settlement cracks, DIY ceiling crack repair without professional help is completely doable in an afternoon. Here’s what you’ll need and how to do it step by step.
Tools and Materials You’ll Need
- Joint compound (also called drywall mud) or spackle for small cracks
- Self-adhesive mesh tape or paper tape
- A 6-inch putty knife and a wider 10-12 inch taping knife
- Fine-grit sandpaper (150-220 grit)
- A sanding pole or sponge for overhead work
- Primer and ceiling paint
- A stepladder and drop cloth
- Safety goggles and a dust mask
Step-by-Step Ceiling Crack Repair Tutorial
This easy ceiling crack repair tutorial works for both drywall and plaster ceilings, with a few small adjustments noted below.
- Widen and clean the crack. Use the corner of your putty knife to gently widen the crack slightly and remove any loose debris, dust, or flaking paint. This gives the joint compound something to grip.
- Apply mesh tape. Press self-adhesive mesh tape directly over the crack, centering it so it covers equal amounts on both sides.
- Apply the first coat of joint compound. Using your putty knife, spread a thin, even layer of joint compound over the tape, feathering the edges outward so there’s no visible ridge.
- Let it dry completely. Most joint compound needs 24 hours to dry fully. Don’t rush this step — trapped moisture is one of the top reasons ceiling crack repair jobs fail.
- Sand lightly. Once dry, sand the patch smooth with fine-grit sandpaper, feathering the edges into the surrounding ceiling.
- Apply a second, thinner coat. This coat should extend a few inches wider than the first to blend seamlessly with the ceiling.
- Sand again and check under raking light. Shine a flashlight sideways across the ceiling to spot any remaining bumps or dips.
- Prime and paint. Always prime before painting — this step is critical for ceiling crack repair before painting, since unprimed patches absorb paint differently and leave a visible “ghost” outline (often called flashing).
How to Repair Cracks in a Plaster Ceiling
Older homes often have plaster ceilings instead of drywall, and how to repair cracks in a plaster ceiling requires a slightly different approach because plaster is harder, more brittle, and sits on wood or metal lath rather than drywall panels.
For ceiling crack repair for old houses with plaster ceilings:
- Check whether the plaster is still firmly attached to the lath behind it by gently pressing near the crack. If it flexes or feels hollow, the plaster may be detaching, which needs a different fix (like plaster washers) before cosmetic repair.
- Use a plaster-specific bonding compound or a plaster patch product rather than standard drywall joint compound, since plaster and drywall products cure and bond differently.
- Apply fiberglass mesh tape for flexibility, since plaster ceilings move slightly with temperature changes.
- Build up thin layers rather than one thick coat — plaster patches shrink as they dry, and thick applications are more likely to crack again.
- Sand gently, since old plaster can be more fragile than modern drywall compound.
This approach to how to repair cracks in a plaster ceiling helps ensure the patch flexes and ages similarly to the surrounding material, reducing the chance of the crack reappearing.
How to Fix Hairline Cracks in Ceiling Surfaces
If you’re specifically dealing with fine surface cracks rather than deeper structural lines, how to fix hairline cracks in ceiling drywall or plaster is even simpler than a full patch job:
- Lightweight spackle works well for cracks under 1/16 inch, since it shrinks less than heavier joint compound.
- Skip the tape for very fine cracks — mesh tape is really meant for cracks that may reopen or shift; a thin spackle fill is often enough for true hairline cracks.
- Feather the edges wide so the repaired area blends invisibly once painted.
- Recheck after a few weeks. If the same hairline crack reappears in the same spot, it may be tracking a seam or stress point that needs tape reinforcement after all.
Knowing how to fix hairline cracks in ceiling surfaces versus larger cracks helps you avoid over-repairing minor issues or under-repairing ones that need more support.
How to Patch Ceiling Cracks With Joint Compound
Joint compound is the workhorse material for most residential ceiling crack repair projects. If you’re wondering how to patch ceiling cracks with joint compound specifically, the key is thin, layered application rather than one heavy pass.
Quick answer: Apply joint compound over mesh tape in two to three thin coats, sanding lightly between each, then feather the final coat several inches beyond the crack for a seamless blend before priming and painting.
A few pro tips that make a real difference:
- Mix joint compound to a smooth, lump-free consistency — pancake batter is a good comparison.
- Hold your knife at roughly a 45-degree angle for even pressure and less dragging.
- Work in sections no longer than 2-3 feet to keep the compound workable before it starts to set.
- Wipe your knife clean between passes to avoid dragging dried bits into the fresh compound.
How to Repair Drywall Ceiling Seam Cracks
Cracks that run in a perfectly straight line, especially near where two drywall sheets meet, usually indicate a seam issue rather than random settling. Here’s how to repair drywall ceiling seam cracks correctly:
- Cut away any loose or bubbling tape along the seam with a utility knife.
- Apply new paper or mesh tape directly over the seam, centered evenly.
- Cover with joint compound using the same layered, feathered technique described above.
- Pay extra attention to the ends of the seam crack — seams often re-crack at the tips first if they aren’t feathered widely enough.
- If the seam crack keeps returning in the same location, it may indicate movement in the framing above, which is worth having assessed.
Repair Settlement Cracks in Ceiling Areas
Homes naturally shift as they age, and settlement is one of the most common reasons for ceiling cracks. To repair settlement cracks in ceiling drywall or plaster:
- Use flexible mesh tape rather than rigid paper tape, since settlement cracks are more likely to experience slight ongoing movement.
- Consider a flexible, paintable caulk specifically designed for cracks in addition to joint compound if the crack has reopened more than once — it accommodates minor movement better than compound alone.
- Monitor the crack over a few months after your first repair. Minor re-cracking from settlement is common and doesn’t necessarily mean the repair failed; it may just need a touch-up.
Repair Water Damaged Ceiling Cracks
Water-damaged cracks are a different animal entirely, and this is one case where cosmetic repair should never come first. To properly repair water damaged ceiling cracks:
- Find and fix the source first. This could be a roof leak, a bathroom above, HVAC condensation, or a plumbing issue. Painting over a water-damaged crack without solving the leak guarantees the problem returns — often worse.
- Let the area dry completely. This can take several days depending on humidity and airflow. A moisture meter can confirm the area is dry before you patch.
- Cut away and replace damaged drywall or plaster if the material is soft, sagging, or crumbling — patching over compromised material won’t hold.
- Apply a stain-blocking primer before painting, since water stains can bleed through regular paint even after the ceiling is repaired.
- Check for mold, especially if the damage sat unaddressed for a while. If you see dark spots or smell mustiness, consider a professional mold inspection before closing up the repair.
How Much Does Ceiling Crack Repair Cost?
One of the most searched questions on this topic is simply: how much does ceiling crack repair cost? The answer depends heavily on the size of the crack, the material, and whether you DIY it or hire a pro.
| Repair Type | DIY Cost (materials only) | Professional Cost | Typical Time |
|---|---|---|---|
| Small hairline crack (spackle only) | $10–$20 | $150–$300 | 1–2 hours |
| Standard crack with tape and compound | $20–$50 | $250–$450 | Half a day (plus drying time) |
| Plaster ceiling crack repair | $30–$70 | $350–$600 | Half a day to full day |
| Water-damaged section (patch + repaint) | $50–$150 | $400–$800+ | 1–3 days (incl. drying) |
| Structural crack requiring engineer assessment | Not applicable | $500–$2,000+ | Several days to weeks |
Costs vary by region and local labor rates across the USA, so it’s worth getting two or three quotes if you’re hiring out a larger ceiling crack repair job. For simple hairline and settlement cracks, DIY ceiling crack repair without professional help is often the most cost-effective route.
Ceiling Crack Repair Tips for Beginners
If this is your first time tackling a project like this, these ceiling crack repair tips for beginners will help you avoid the most common mistakes:
- Don’t rush the drying time. Applying a second coat over wet compound is the number one cause of failed repairs.
- Always wear eye protection when sanding overhead — dust falls directly toward your face.
- Use a headlamp or raking light to spot imperfections that overhead room lighting hides.
- Prime before you paint, especially for ceiling crack repair before painting a large or visible area, to avoid flashing or uneven sheen.
- Match your ceiling texture if applicable — a smooth patch on a textured popcorn ceiling will stand out immediately.
- Start with a small, low-visibility crack to build confidence before tackling a larger or more visible one.
Best Way to Repair Ceiling Cracks Permanently
So what’s actually the best way to repair ceiling cracks permanently, rather than just temporarily? The honest answer: address the root cause, not just the symptom.
- If the cause is humidity swings, consider a dehumidifier or better attic ventilation.
- If the cause is a leak, fix the leak completely before doing cosmetic ceiling crack repair.
- If the cause is settlement, use flexible tape and compound designed to handle minor ongoing movement.
- If the cause is structural, get an engineer’s assessment and have any underlying issue corrected first.
Skipping this diagnostic step is why so many ceiling crack repair jobs need to be redone within a year. Fixing the cause, then applying the correct patching technique for your ceiling material, is genuinely the best way to repair ceiling cracks permanently.
Frequently Asked Questions
Is it normal for ceilings to crack over time?
Yes. Most homes develop minor hairline cracks as they settle, as materials expand and contract seasonally, and as ceilings age. This is generally cosmetic and not a cause for alarm.
Can I paint directly over a ceiling crack without repairing it?
Painting over an unrepaired crack is not recommended. The crack will likely show through the paint and may widen over time. Proper ceiling crack repair before painting ensures a smooth, long-lasting finish.
How long does joint compound take to dry before I can paint?
Most joint compound needs about 24 hours to dry fully between coats, and the final coat should also cure for 24 hours before priming and painting.
Do I need mesh tape for every ceiling crack repair?
Not always. Very fine hairline cracks can sometimes be filled with spackle alone, but any crack wider than a hairline, or one that has reappeared before, benefits from mesh or paper tape for reinforcement.
When should I call a professional instead of doing DIY ceiling crack repair?
Call a professional if the crack is wider than 1/4 inch, runs diagonally, is paired with sagging or bulging, or keeps returning after repeated repairs — these can indicate structural or moisture issues beyond a cosmetic fix.
Final Thoughts
Ceiling crack repair doesn’t have to be intimidating. Most cracks you’ll encounter — hairline lines, seam cracks, and minor settlement cracks — are well within reach of a confident DIYer with the right materials and a little patience. The keys are simple: identify the cause, choose the correct technique for your ceiling material, apply joint compound in thin layered coats, and always prime before you paint.
If you’ve inspected your crack and it falls into a “worry” category — wide, diagonal, or paired with sagging — don’t guess. Bring in a licensed contractor or structural engineer to assess it properly before any cosmetic repair.
Ready to get started? Grab your joint compound, tape, and putty knife, and tackle that crack this weekend — your ceiling (and your peace of mind) will thank you.