
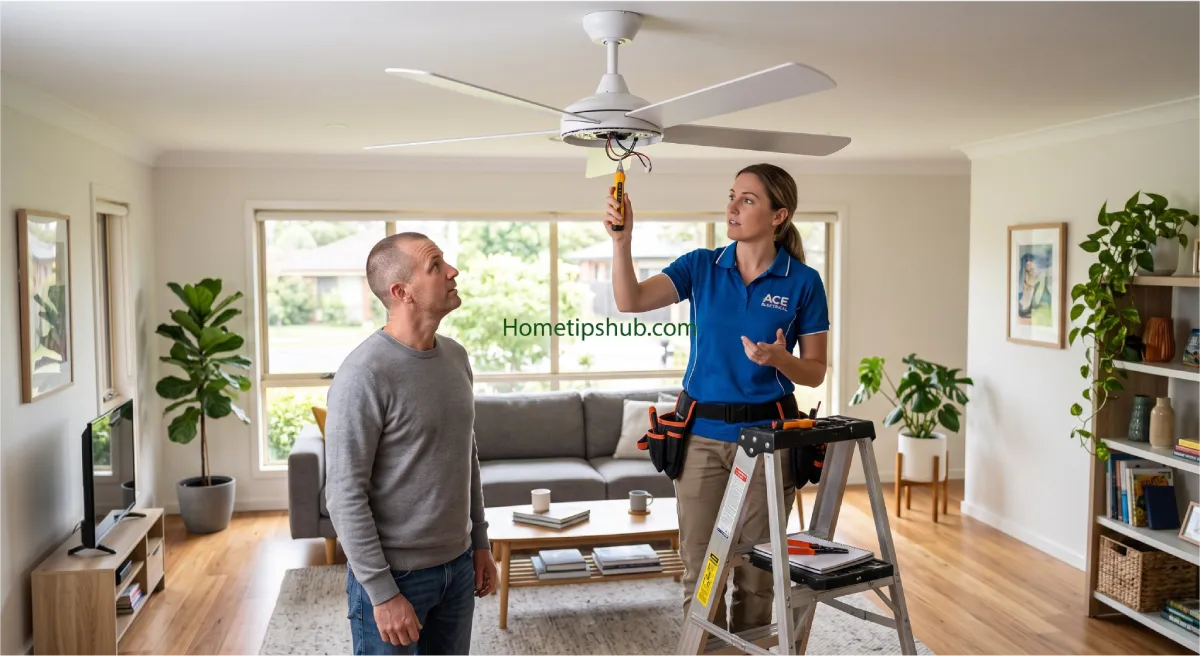
Few things are more annoying on a hot night than flipping the switch and watching your ceiling fan just sit there, silent and useless. Or worse — it turns on, but it wobbles like it’s trying to escape the ceiling, hums like an angry bee, or spins so slowly you barely feel a breeze. If you’ve been searching for a reliable ceiling fan repair guide that actually walks you through real solutions instead of vague tips, you’re in the right place.
This guide covers everything from diagnosing why your fan won’t start to balancing a wobbling blade, replacing a bad capacitor, and knowing when it’s time to call a pro. Whether you’re a beginner or handy around the house, these tricks will save you time, money, and a trip to the hardware store for the wrong part.
By the end, you’ll know how to troubleshoot common fan problems, understand realistic repair costs, and confidently decide whether a DIY fix or professional service is the smarter move.
Why Ceiling Fan Repair Matters More Than You Think
A malfunctioning fan isn’t just an inconvenience — it can quietly drive up your energy bills, strain your HVAC system, and in some cases signal a wiring issue that poses a real safety risk. Ceiling fan repair is one of the most common home maintenance tasks in the U.S., especially during summer months when fans run for hours every day.
The good news? Most ceiling fan repair jobs don’t require replacing the entire unit. In fact, the majority of issues — wobbling, humming, slow spinning, or a fan that won’t start — come down to a handful of fixable culprits: loose screws, worn capacitors, dirty blades, or a dying motor. Understanding these basics before you call an electrician can save you significant money and downtime.
Common Ceiling Fan Problems and Solutions
Before diving into step-by-step fixes, it helps to understand the most frequent issues homeowners run into. Here’s a quick-reference table covering common ceiling fan problems and solutions.
| Problem | Likely Cause | Quick Solution |
|---|---|---|
| Fan won’t start | Dead capacitor, blown fuse, faulty switch | Test power, replace capacitor or switch |
| Fan is noisy or humming | Loose screws, worn bearings, unbalanced blades | Tighten hardware, lubricate, balance blades |
| Fan wobbles | Bent blade bracket, uneven blades, loose mount | Use a balancing kit, check blade alignment |
| Fan spins slowly | Weak capacitor, dirty motor, wrong speed setting | Replace capacitor, clean motor housing |
| Light works but fan doesn’t | Separate circuit issue, faulty pull chain switch | Replace pull chain switch or check wiring |
| Fan slow after repair | Incorrect capacitor rating, loose wiring | Verify capacitor specs match fan model |
This table is a great starting point for any ceiling fan repair project, but let’s break each issue down in detail.
How to Repair a Ceiling Fan That Won’t Start
This is one of the most common reasons people search for ceiling fan repair help. If your fan doesn’t respond at all when you flip the switch, follow this troubleshooting sequence:
- Check the power source. Confirm the circuit breaker hasn’t tripped and the wall switch is functioning. Test the outlet or switch with a voltage tester.
- Inspect the pull chain switch. A worn-out pull chain switch is a frequent culprit. If you hear a click but nothing happens, the switch itself may need replacing — this is a simple, affordable ceiling fan repair.
- Test the capacitor. A dead or weak capacitor is the number one reason fans fail to start. More on this below.
- Check wiring connections. Loose wire nuts inside the mounting bracket can interrupt power flow. Turn off power at the breaker before opening the housing.
If you’ve worked through this list and the fan still won’t start, the motor itself may be the issue, which we’ll cover further down.
How to Fix a Noisy Ceiling Fan (Why Is My Ceiling Fan Humming?)
A humming or clicking ceiling fan is usually not dangerous, but it’s annoying — and it’s often an early warning sign of a bigger problem. If you’re asking “why is my ceiling fan humming,” here are the most common causes:
- Loose screws or mounting hardware — vibration from spinning blades gradually loosens components.
- Dust buildup on blades — this throws off balance and creates a subtle hum.
- Worn motor bearings — over years of use, bearings dry out and start to grind.
- Incompatible dimmer switch — many humming complaints trace back to using a light dimmer to control fan speed, which isn’t designed for motor control.
Step-by-Step Fix for a Noisy Fan
- Turn off power at the breaker.
- Tighten all visible screws, including the canopy, downrod, and blade brackets.
- Wipe down each blade and the motor housing to remove dust.
- Apply a few drops of lightweight machine oil to the motor bearings if your model allows access (check your owner’s manual).
- Replace any dimmer switch with a proper fan-speed control switch.
This kind of ceiling fan repair takes less than 30 minutes for most homeowners and solves the majority of humming complaints.
Ceiling Fan Capacitor Replacement Guide
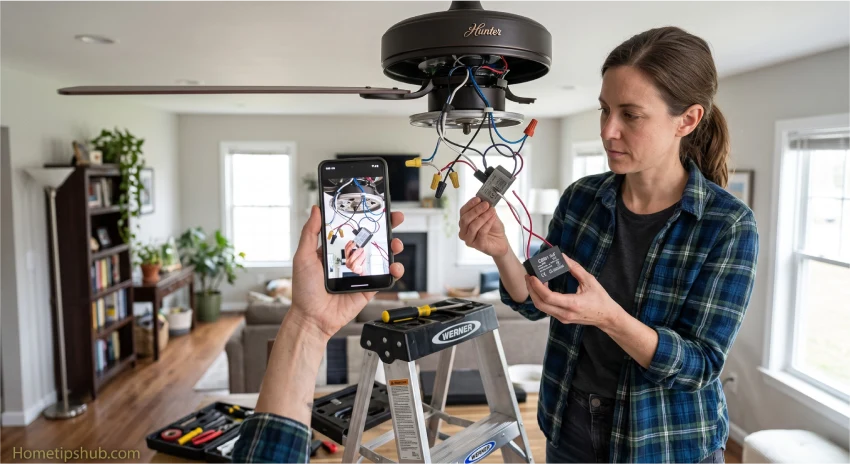
The capacitor is a small electronic component that gives your fan motor the initial push it needs to start spinning and helps regulate speed. When it fails, you’ll typically notice the fan humming without spinning, starting slowly, or not starting at all.
Signs You Need a Capacitor Replacement
- Fan hums but blades don’t move
- Fan starts only when you spin the blades by hand
- Fan runs at one speed only, regardless of switch setting
- Fan spins slowly after repair attempts on other parts
How to Replace a Ceiling Fan Capacitor
- Turn off power at the breaker and confirm with a voltage tester.
- Remove the fan’s switch housing cover (usually on the bottom of the motor).
- Locate the capacitor — a small rectangular component with multiple colored wires.
- Take a photo of the wiring before disconnecting anything.
- Note the capacitor’s microfarad (μF) rating, printed on its label.
- Purchase an exact-match replacement capacitor (available at hardware stores or online).
- Disconnect the old capacitor and connect the new one, matching wire colors exactly.
- Reassemble the housing and restore power to test.
This single ceiling fan repair fixes a surprising number of “dead fan” complaints and typically costs under $15 for the part itself.
How to Balance a Wobbling Ceiling Fan
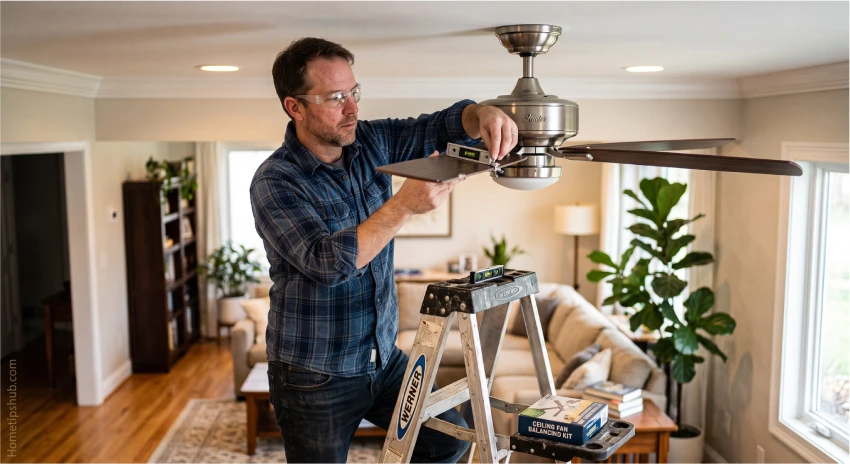
A wobbling fan isn’t just annoying — over time it stresses the mounting bracket and can eventually cause the fan to fall. Fortunately, this is one of the easiest ceiling fan repair tasks for beginners.
DIY Balancing Steps
- Tighten everything first. Loose blade screws are the most common cause of wobble.
- Check blade alignment. Measure from the tip of each blade to the ceiling. If one is noticeably higher or lower, gently bend the blade bracket (not the blade itself) to match the others.
- Use a balancing kit. These inexpensive kits (usually under $10) include a plastic clip and adhesive weights. Clip it to the middle of each blade one at a time until you find the blade causing the imbalance, then attach a weight to the base of that blade.
- Clean and inspect the blades. Warped or cracked blades should be replaced rather than repaired.
| Wobble Cause | Fix | Difficulty |
|---|---|---|
| Loose blade screws | Tighten with screwdriver | Easy |
| Uneven blade height | Adjust blade bracket | Easy |
| Warped blade | Replace blade set | Moderate |
| Loose mounting bracket | Tighten ceiling mount screws | Moderate |
| Unbalanced motor | Balancing kit or motor repair | Moderate |
Ceiling Fan Not Spinning But Light Works — What’s Going On?
This specific scenario confuses a lot of homeowners because it seems contradictory: the light works, so there’s power, but the blades won’t move. In most ceiling fans, the light kit and motor operate on separate circuits within the same unit, which is why one can fail while the other keeps working.
Most likely causes:
- Failed capacitor (most common)
- Burned-out motor winding
- Broken pull chain switch dedicated to fan speed
- Jammed or obstructed blades
Start with the capacitor, since it’s the cheapest and most common fix. If replacing it doesn’t solve the issue, the motor itself may need attention.
Ceiling Fan Motor Repair Cost vs. Replacement
Sometimes the motor is the real problem, and this is where many people start wondering whether ceiling fan repair is even worth it compared to buying a new fan.
Ceiling Fan Repair Cost Near Me: What to Expect
Costs vary by region and complexity, but here’s a general breakdown for U.S. homeowners:
| Repair Type | Average Cost (DIY Parts) | Average Cost (Professional) |
|---|---|---|
| Capacitor replacement | $8 – $15 | $60 – $120 |
| Pull chain switch replacement | $5 – $12 | $50 – $90 |
| Blade balancing kit | $5 – $10 | $50 – $80 (labor only) |
| Motor repair | $30 – $80 | $100 – $250 |
| Full motor replacement | $50 – $150 | $150 – $350 |
| Complete fan replacement | $60 – $300+ | $150 – $400 (installed) |
If you’re searching “cost near me,” get at least two quotes from local electricians, since labor rates vary by city and demand. As a rule of thumb: if motor repair costs more than 50% of a new fan’s price, replacement is usually the smarter long-term choice.
Ceiling Fan Repair Without Replacing the Motor
Many people assume any serious ceiling fan problem means a full motor swap, but that’s rarely true. Here are ceiling fan repair options that avoid motor replacement entirely:
- Capacitor swap — fixes most “won’t start” and “spins slowly” issues.
- Bearing lubrication — resolves grinding noises without opening the motor.
- Switch and wiring repair — addresses power delivery problems.
- Blade rebalancing — corrects wobble caused by uneven weight distribution.
- Remote or wall control replacement — fixes speed inconsistency issues that aren’t motor-related.
Reserve motor replacement for cases where the windings have visibly burned out, the motor overheats and shuts off, or you smell burning plastic — these are signs of irreversible motor damage.
How to Repair a Ceiling Fan Pull Chain
A broken or stuck pull chain is a small but common repair. Here’s how to fix it:
- Turn off power at the breaker.
- Remove the switch housing cover to access the pull chain switch.
- If the chain has simply detached, reattach it to the small metal loop on the switch.
- If the switch itself is broken (you’ll hear a hollow click with no speed change), purchase a universal 3-speed pull chain switch — these are inexpensive and widely available.
- Match new wires to old wire colors, reconnect, and test.
This is one of the easiest entries on any ceiling fan repair checklist and usually takes under 15 minutes.
Ceiling Fan Troubleshooting Step by Step
If you’re not sure where to start, use this general ceiling fan troubleshooting sequence before diagnosing a specific problem:
- Confirm power is reaching the fan (breaker, switch, outlet).
- Listen for humming — if present, suspect the capacitor.
- Check for wobble — if present, inspect blades and mounting.
- Test the light separately from the fan motor.
- Inspect the pull chain and any remote/wall control.
- Open the switch housing and visually inspect wiring and the capacitor.
- If none of the above resolve it, consider motor condition and repair cost.
Following this order prevents wasted time replacing parts that aren’t actually the problem — a mistake that trips up a lot of first-time DIYers.
DIY Repair Guide: Tools You’ll Need
Having the right tools on hand makes any repair job faster and safer:
- Non-contact voltage tester
- Phillips and flathead screwdrivers
- Wire strippers/cutters
- Replacement capacitor (matched to your fan model)
- Blade balancing kit
- Step ladder
- Lightweight machine oil
- Flashlight or headlamp
Ceiling Fan Repair Tips for Beginners
If you’re new to home repairs, keep these ceiling fan repair tips in mind:
- Always cut power at the breaker, not just the wall switch, before opening any housing.
- Take photos before disconnecting wires so you can reference them during reassembly.
- Match capacitor ratings exactly — using the wrong microfarad rating can cause a fan to spin slowly after repair or fail again quickly.
- Don’t over-tighten blade screws, which can strip the mounting holes over time.
- When in doubt, stop and call a licensed electrician, especially if you notice scorch marks, exposed wiring, or a burning smell.
Frequently Asked Questions
Why does my ceiling fan spin slowly after repair?
This usually means the replacement capacitor has the wrong microfarad rating, or a wiring connection is loose. Double-check the capacitor label against your fan’s original specifications.
Why is my ceiling fan humming even when it’s off?
This typically points to a faulty wall switch or dimmer left in a partial “on” position, allowing a small current to reach the motor. Replacing the switch usually resolves it.
Can I do ceiling fan repair myself, or do I need an electrician?
Many issues — capacitors, pull chains, balancing, and cleaning — are beginner-friendly DIY ceiling fan repair tasks. However, if you’re uncomfortable working with wiring or the issue involves the electrical panel itself, hire a licensed electrician.
How much does ceiling fan repair cost on average?
DIY parts typically run $5–$80 depending on the issue, while professional ceiling fan repair costs range from $50–$250 depending on complexity and local labor rates.
How do I know if it’s the capacitor or the motor?
If the fan hums but doesn’t spin, or spins only when pushed by hand, start with the capacitor — it’s the cheaper and more common fix. If a new capacitor doesn’t solve it, the motor windings may be damaged.
Final Thoughts on Ceiling Fan Repair
Most ceiling fan problems — wobbling, humming, slow spinning, or a fan that won’t start — come down to a handful of fixable issues you can handle yourself with basic tools and a little patience. From capacitor replacement to blade balancing to pull chain fixes, this ceiling fan repair guide covers the most common scenarios homeowners face across the U.S.
Before you assume you need a brand-new fixture, work through the troubleshooting steps above. In most cases, a $10–$15 part and 30 minutes of your time is all it takes. And if you run into wiring issues beyond your comfort level, don’t hesitate to call a licensed electrician — safety always comes first.
Ready to get your fan spinning smoothly again? Grab your voltage tester, work through the checklist above, and tackle your ceiling fan repair with confidence today.