
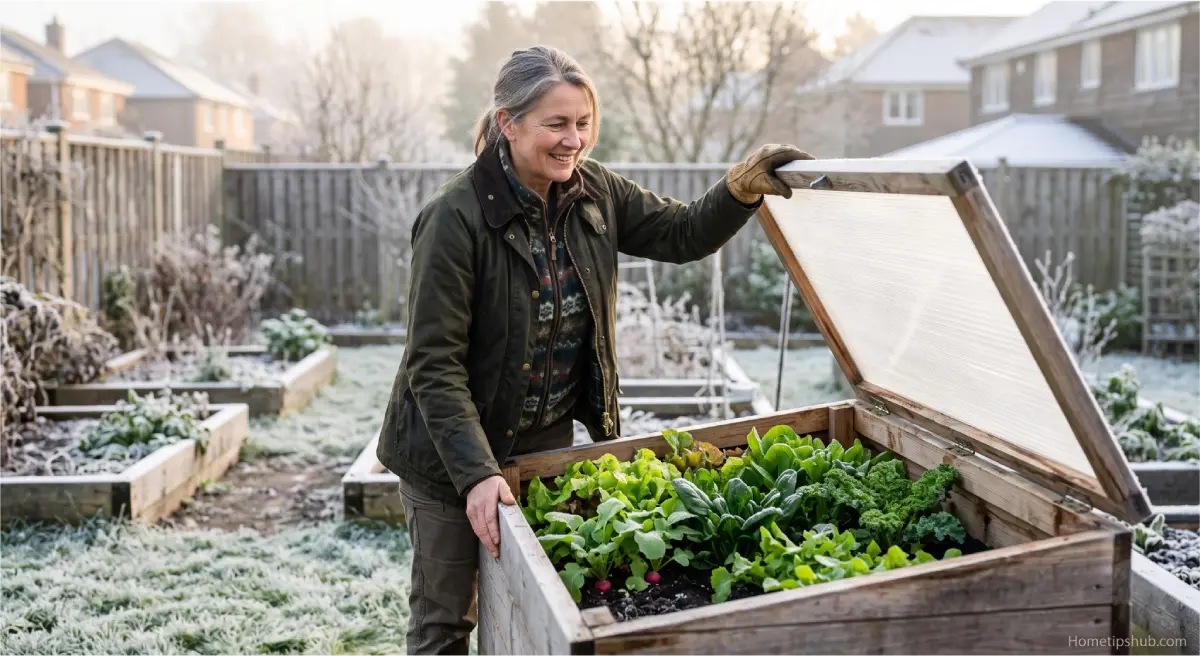
If you’ve ever stared out at a frost-covered backyard in March, wishing you could already have seedlings in the ground, you’re not alone. That’s exactly the problem cold frame gardening was invented to solve. A cold frame is essentially a mini, unheated greenhouse that sits low to the ground, trapping warmth from the sun while shielding plants from wind, frost, and snow.
Whether you’re a weekend hobbyist or someone trying to stretch your growing season through a long Midwestern winter, cold frame gardening can add weeks — sometimes months — to your harvest calendar. In this guide, we’ll walk through what a cold frame is, how to build or buy one, which vegetables and plants thrive inside it, and the practical tips that separate a thriving cold frame garden from a frozen disappointment.
By the end, you’ll have a clear, actionable plan for starting your own cold frame garden, no matter your climate zone or budget.
What Is Cold Frame Gardening?
Cold frame gardening is the practice of using a bottomless box with a transparent lid — usually glass or clear polycarbonate — to create a protected microclimate for plants. The box sits directly on soil or a raised bed, and the angled, see-through top lets sunlight in while holding heat close to the plants underneath.
Unlike a full greenhouse, a cold frame doesn’t require electricity, heating systems, or a large footprint. It relies purely on passive solar energy. This makes cold frame gardening one of the most affordable and beginner-friendly ways to extend your growing season, whether you’re starting seeds early in spring or keeping hardy greens alive well into December.
Gardeners have relied on this method for centuries, particularly in regions with unpredictable frost dates. Today, cold frame gardening is having a resurgence among home gardeners who want fresh produce without the expense of a heated greenhouse.
Why Cold Frame Gardening Works So Well
The science behind cold frame gardening is simple. Sunlight passes through the clear lid and warms the soil and air inside the box. That warmth gets trapped because the solid walls block wind and the glazing prevents heat from escaping as quickly as it would in the open air. This creates a buffer zone that can be 10 to 20 degrees Fahrenheit warmer than the outside temperature, even on a cold, sunny day.
That temperature buffer is often the difference between a seedling surviving a late frost and one that doesn’t.
Benefits of Cold Frame Gardening
Before diving into the how-to, it helps to understand why so many gardeners across the USA — from New England to the Pacific Northwest — swear by cold frame gardening.
- Extended growing season: Start seeds 4-6 weeks earlier in spring and harvest greens weeks later into fall or winter.
- Protection from pests: The enclosed structure keeps out rabbits, deer, and many insects.
- Lower water needs: The enclosed environment reduces evaporation, meaning less frequent watering.
- Hardening off made easy: Cold frames are perfect for acclimating indoor-started seedlings to outdoor conditions before transplanting.
- Budget-friendly: A basic cold frame costs far less than a heated greenhouse, and many gardeners build one from recycled materials.
| Benefit | Traditional Outdoor Garden | Cold Frame Gardening |
|---|---|---|
| Growing season length | Limited by local frost dates | Extended by 6-10 weeks |
| Protection from frost | None | Strong (10-20°F warmer inside) |
| Pest protection | Minimal | Moderate to strong |
| Startup cost | Low | Low to moderate |
| Water usage | Higher (evaporation) | Lower (enclosed humidity) |
| Maintenance | Weeding, watering | Daily venting, monitoring |
How to Build a Cold Frame: Step-by-Step
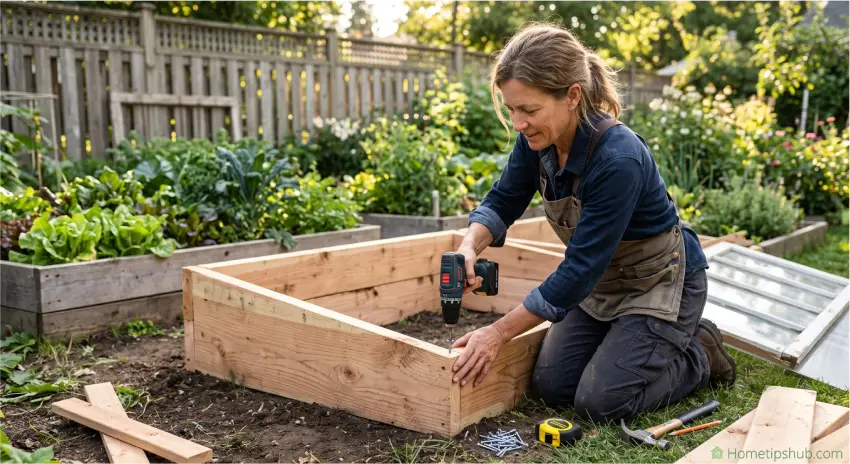
One of the best things about cold frame gardening is that you don’t need carpentry skills or a big budget to get started. Here’s a straightforward process for building a basic wooden cold frame.
Materials You’ll Need
- Untreated cedar or pine boards (rot-resistant woods work best)
- An old window, storm door, or clear polycarbonate sheet for the lid
- Hinges to attach the lid
- Screws, a drill, and basic hand tools
- A prop stick or automatic vent opener (optional but recommended)
Building Steps
- Choose your location. Pick a spot with southern exposure that gets full sun and has good drainage. This is critical for successful cold frame gardening.
- Build the box frame. Construct a rectangular box with the back wall taller than the front. This angle helps maximize sun exposure and lets rain and snow slide off the lid.
- Attach the lid. Hinge your window or polycarbonate cover to the tall back wall so it opens like a lid.
- Seal any gaps. Use weatherstripping or caulk to minimize heat loss around the edges.
- Add ventilation. Install a way to prop the lid open on warm days, either manually or with an automatic solar vent opener.
- Place it over your bed. Position the cold frame directly over prepared soil or a raised bed so plants can be grown right underneath.
| Step | Task | Time Needed | Difficulty |
|---|---|---|---|
| 1 | Select location | 15 minutes | Easy |
| 2 | Build the box | 2-4 hours | Moderate |
| 3 | Attach lid/hinges | 30-60 minutes | Easy-Moderate |
| 4 | Seal and weatherproof | 30 minutes | Easy |
| 5 | Add ventilation system | 30-60 minutes | Easy-Moderate |
| 6 | Install over garden bed | 15 minutes | Easy |
If DIY isn’t your thing, pre-made cold frame kits are widely available online and at garden centers, ranging from simple polycarbonate boxes to more elaborate cedar-and-glass designs.
Best Vegetables and Plants for a Cold Frame Garden
Not every plant is suited for cold frame growing. The best candidates are cold-hardy vegetables and greens that tolerate cooler temperatures and lower light levels.
Top Cold Frame Vegetables
- Lettuce and salad greens
- Spinach
- Kale
- Swiss chard
- Radishes
- Carrots
- Arugula
- Scallions and green onions
Best Cold Frame Plants for Seed Starting
Cold frame gardening is also a favorite technique for hardening off seedlings started indoors. Popular choices include:
- Broccoli and cauliflower starts
- Cabbage seedlings
- Herbs like parsley and thyme
- Pansies and other cold-hardy flowers
| Plant Type | Best Season to Grow | Approx. Days to Harvest | Cold Tolerance |
|---|---|---|---|
| Lettuce | Fall, Winter, Early Spring | 30-45 days | High |
| Spinach | Fall, Winter | 40-50 days | Very High |
| Kale | Fall, Winter | 50-65 days | Very High |
| Radishes | Early Spring, Fall | 25-30 days | High |
| Carrots | Fall, Winter | 60-75 days | High |
| Swiss Chard | Fall, Early Spring | 50-60 days | Moderate-High |
Cold Frame Gardening Tips for Beginners
If you’re new to cold frame gardening, a few practical habits will save you from common beginner mistakes.
- Vent daily on sunny days. Even in winter, direct sun can heat the inside of a cold frame well above 90°F, which can scorch tender plants. Prop the lid open during the day and close it at night.
- Monitor soil moisture. The enclosed environment reduces evaporation, so check soil regularly rather than watering on a fixed schedule.
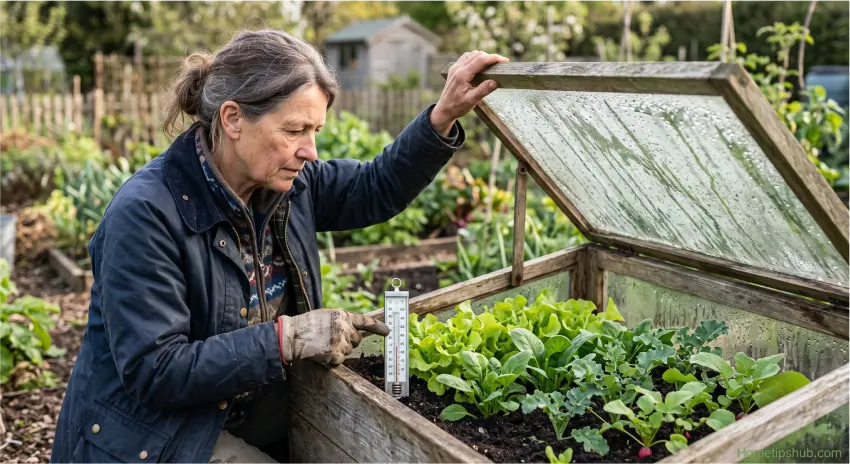
- Use a thermometer. A simple min/max thermometer placed inside your cold frame takes the guesswork out of managing temperature swings.
- Insulate on the coldest nights. Old blankets, straw bales, or foam boards placed around or over the cold frame can add extra protection during hard freezes.
- Rotate crops seasonally. Just like an outdoor garden, cold frame vegetables benefit from crop rotation to avoid soil-borne disease buildup.
- Start with easy crops. Lettuce and radishes are forgiving choices for anyone new to cold frame growing.
- Angle the lid toward the sun. Positioning your cold frame with the sloped lid facing south (in the Northern Hemisphere) maximizes light capture.
These simple cold frame gardening tips apply whether you’re working with a small backyard box or a larger multi-panel setup.
Cold Frame Gardening Ideas to Maximize Your Space
Once you’ve got the basics down, there are several creative cold frame gardening ideas worth trying:
- Stack straw bales around the cold frame for extra insulation in especially harsh climates.
- Use a cold frame over a raised bed to combine the benefits of improved drainage with season extension.
- Try a “hot bed” variation by layering fresh manure or compost beneath the growing soil; as it decomposes, it generates gentle heat.
- Repurpose old windows for a budget-friendly, sustainable build.
- Install an automatic vent opener powered by a temperature-sensitive solar cylinder — no electricity required, and it prevents overheating if you’re away during the day.
- Group multiple small cold frames rather than one large one, so you can manage different crops with different temperature needs.
Common Mistakes in Cold Frame Gardening (And How to Avoid Them)
Even experienced gardeners run into a few recurring issues with cold frame growing. Here’s what to watch for:
| Mistake | Why It Happens | Solution |
|---|---|---|
| Overheating plants | Lid left closed on sunny days | Vent daily once temps rise above 40-45°F inside |
| Poor drainage | Cold frame placed on low or compacted ground | Choose a well-drained site or add gravel base |
| Weak seedlings | Insufficient light exposure | Use clear, clean glazing and wipe off condensation |
| Frost damage | Lid left open overnight | Close lid before sunset on cold nights |
| Pest infestations | Gaps in the frame allow entry | Seal edges and check the frame seasonally |
Frequently Asked Questions About Cold Frame Gardening
What is the ideal temperature inside a cold frame?
Most cold-hardy vegetables do best when the inside temperature stays between 45°F and 75°F. Anything consistently above 80°F should be vented to prevent stress on the plants.
Can I use a cold frame in the winter?
Yes. Cold frame gardening is especially popular for growing hardy greens like spinach and kale through winter in USDA zones 5 through 8, and even colder zones with added insulation.
How is a cold frame different from a greenhouse?
A cold frame is smaller, unheated, and relies entirely on passive solar energy, while a greenhouse is typically larger and may include heating, electricity, and ventilation systems. Cold frame gardening is generally simpler and less expensive to start.
What direction should a cold frame face?
In the Northern Hemisphere, position your cold frame facing south so the sloped lid captures maximum sunlight throughout the day.
Do I need to water plants in a cold frame?
Yes, but less often than an open garden bed. The enclosed space retains moisture longer, so check the soil every few days rather than watering on autopilot.
Final Thoughts: Start Your Cold Frame Garden Today
Cold frame gardening is one of the simplest, most cost-effective ways to grow more food for more months of the year. Whether you’re hardening off spring seedlings, extending your fall harvest, or keeping fresh greens on the table through winter, a well-placed cold frame can transform how you garden.
Start small: build or buy a basic frame, choose a few cold-hardy vegetables like lettuce, spinach, or radishes, and get comfortable with daily venting and moisture checks. Once you see how much more you can grow with a simple box and a sheet of glass, you’ll wonder why you didn’t try cold frame gardening sooner.
Ready to get started? Pick a sunny, well-drained spot in your yard this weekend, gather your materials, and build your first cold frame before the next frost date hits. Your future harvest will thank you.